
Tutorial 1: Create Intermediary
Create Intermediary Tutorial
In this Knox Networks Sandbox tutorial, we will walk through the process of creating a Authorized Intermediary named Example Bank with a distribution limit of $10,000.00. A default wallet called Vault will be created alongside the Intermediary.
Step 1: Creating an Authorized Intermediary
The first step in the process in the sandbox is to create an Authorized Intermediary which serves as a Distributor for FBDAs in the system. An Authorized Intermediary in a standard implementation would likely be a commercial bank (e.g. ABC Bank).
Let's create our very own example DFI, called Example Bank.
First, we go to the Financial Institutions page. Then, we click Create Distributor in the top right.
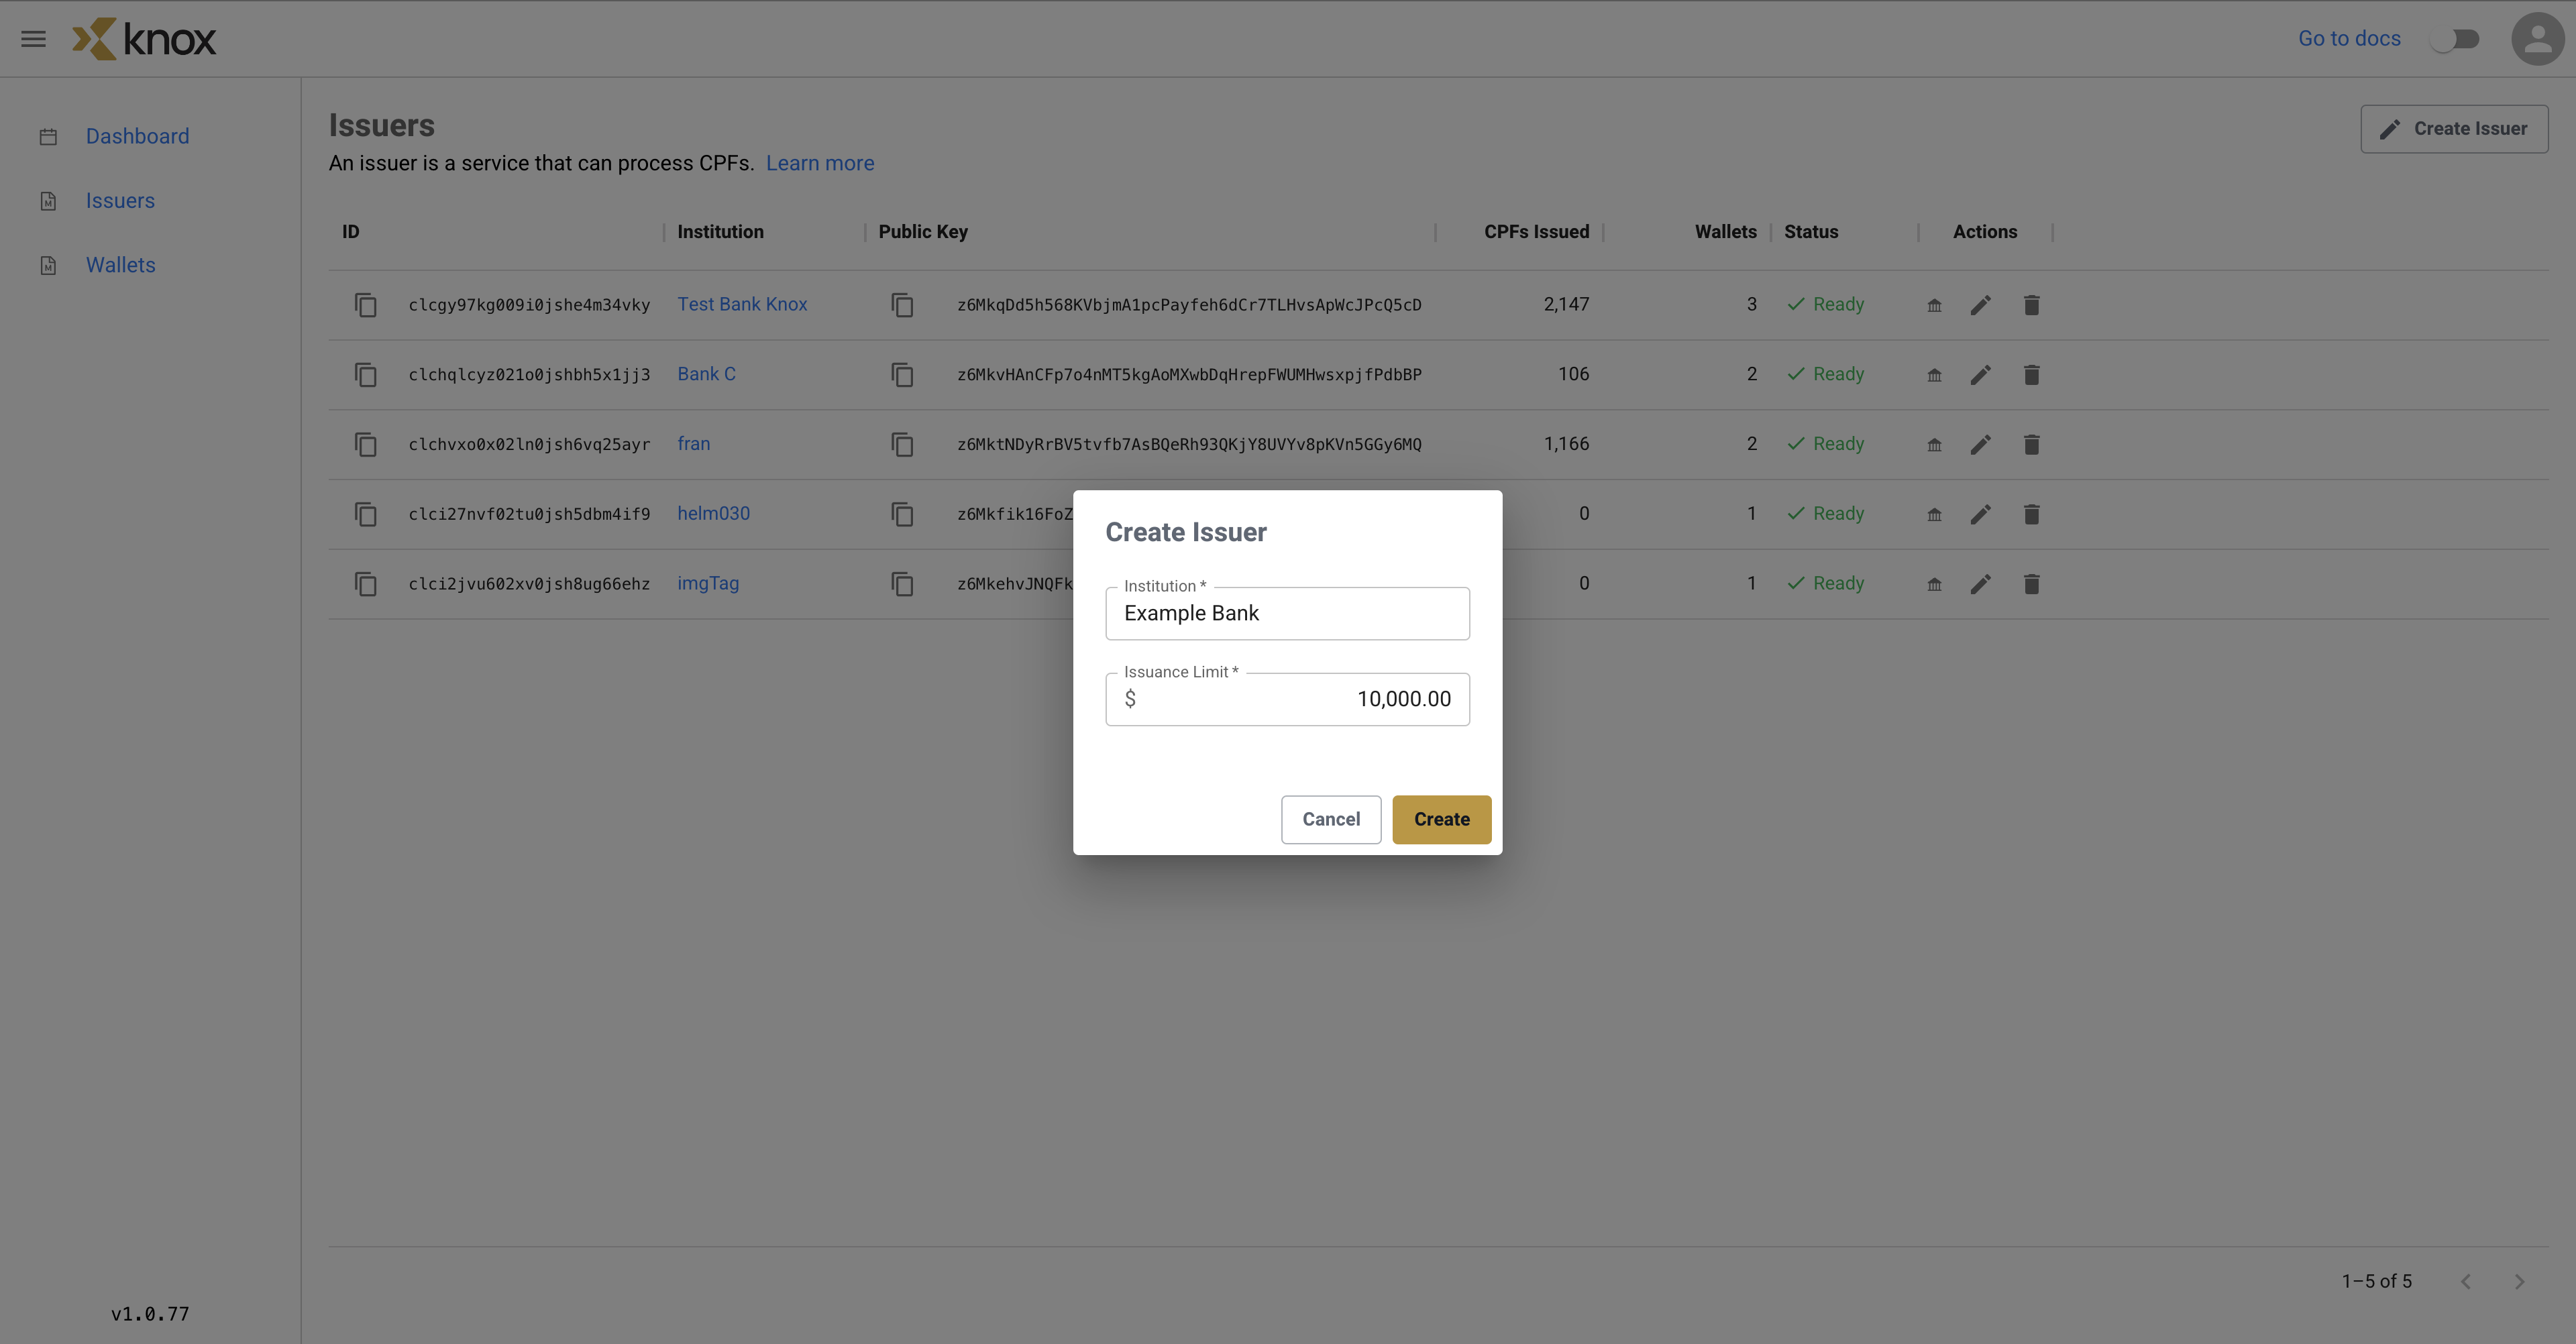
Then, using the pop-up menu, we set the Institution to Example Bank and we can set the distribution limit to any value (let's say $10,000.00). Now, a DFI will be created with the name Example Bank.
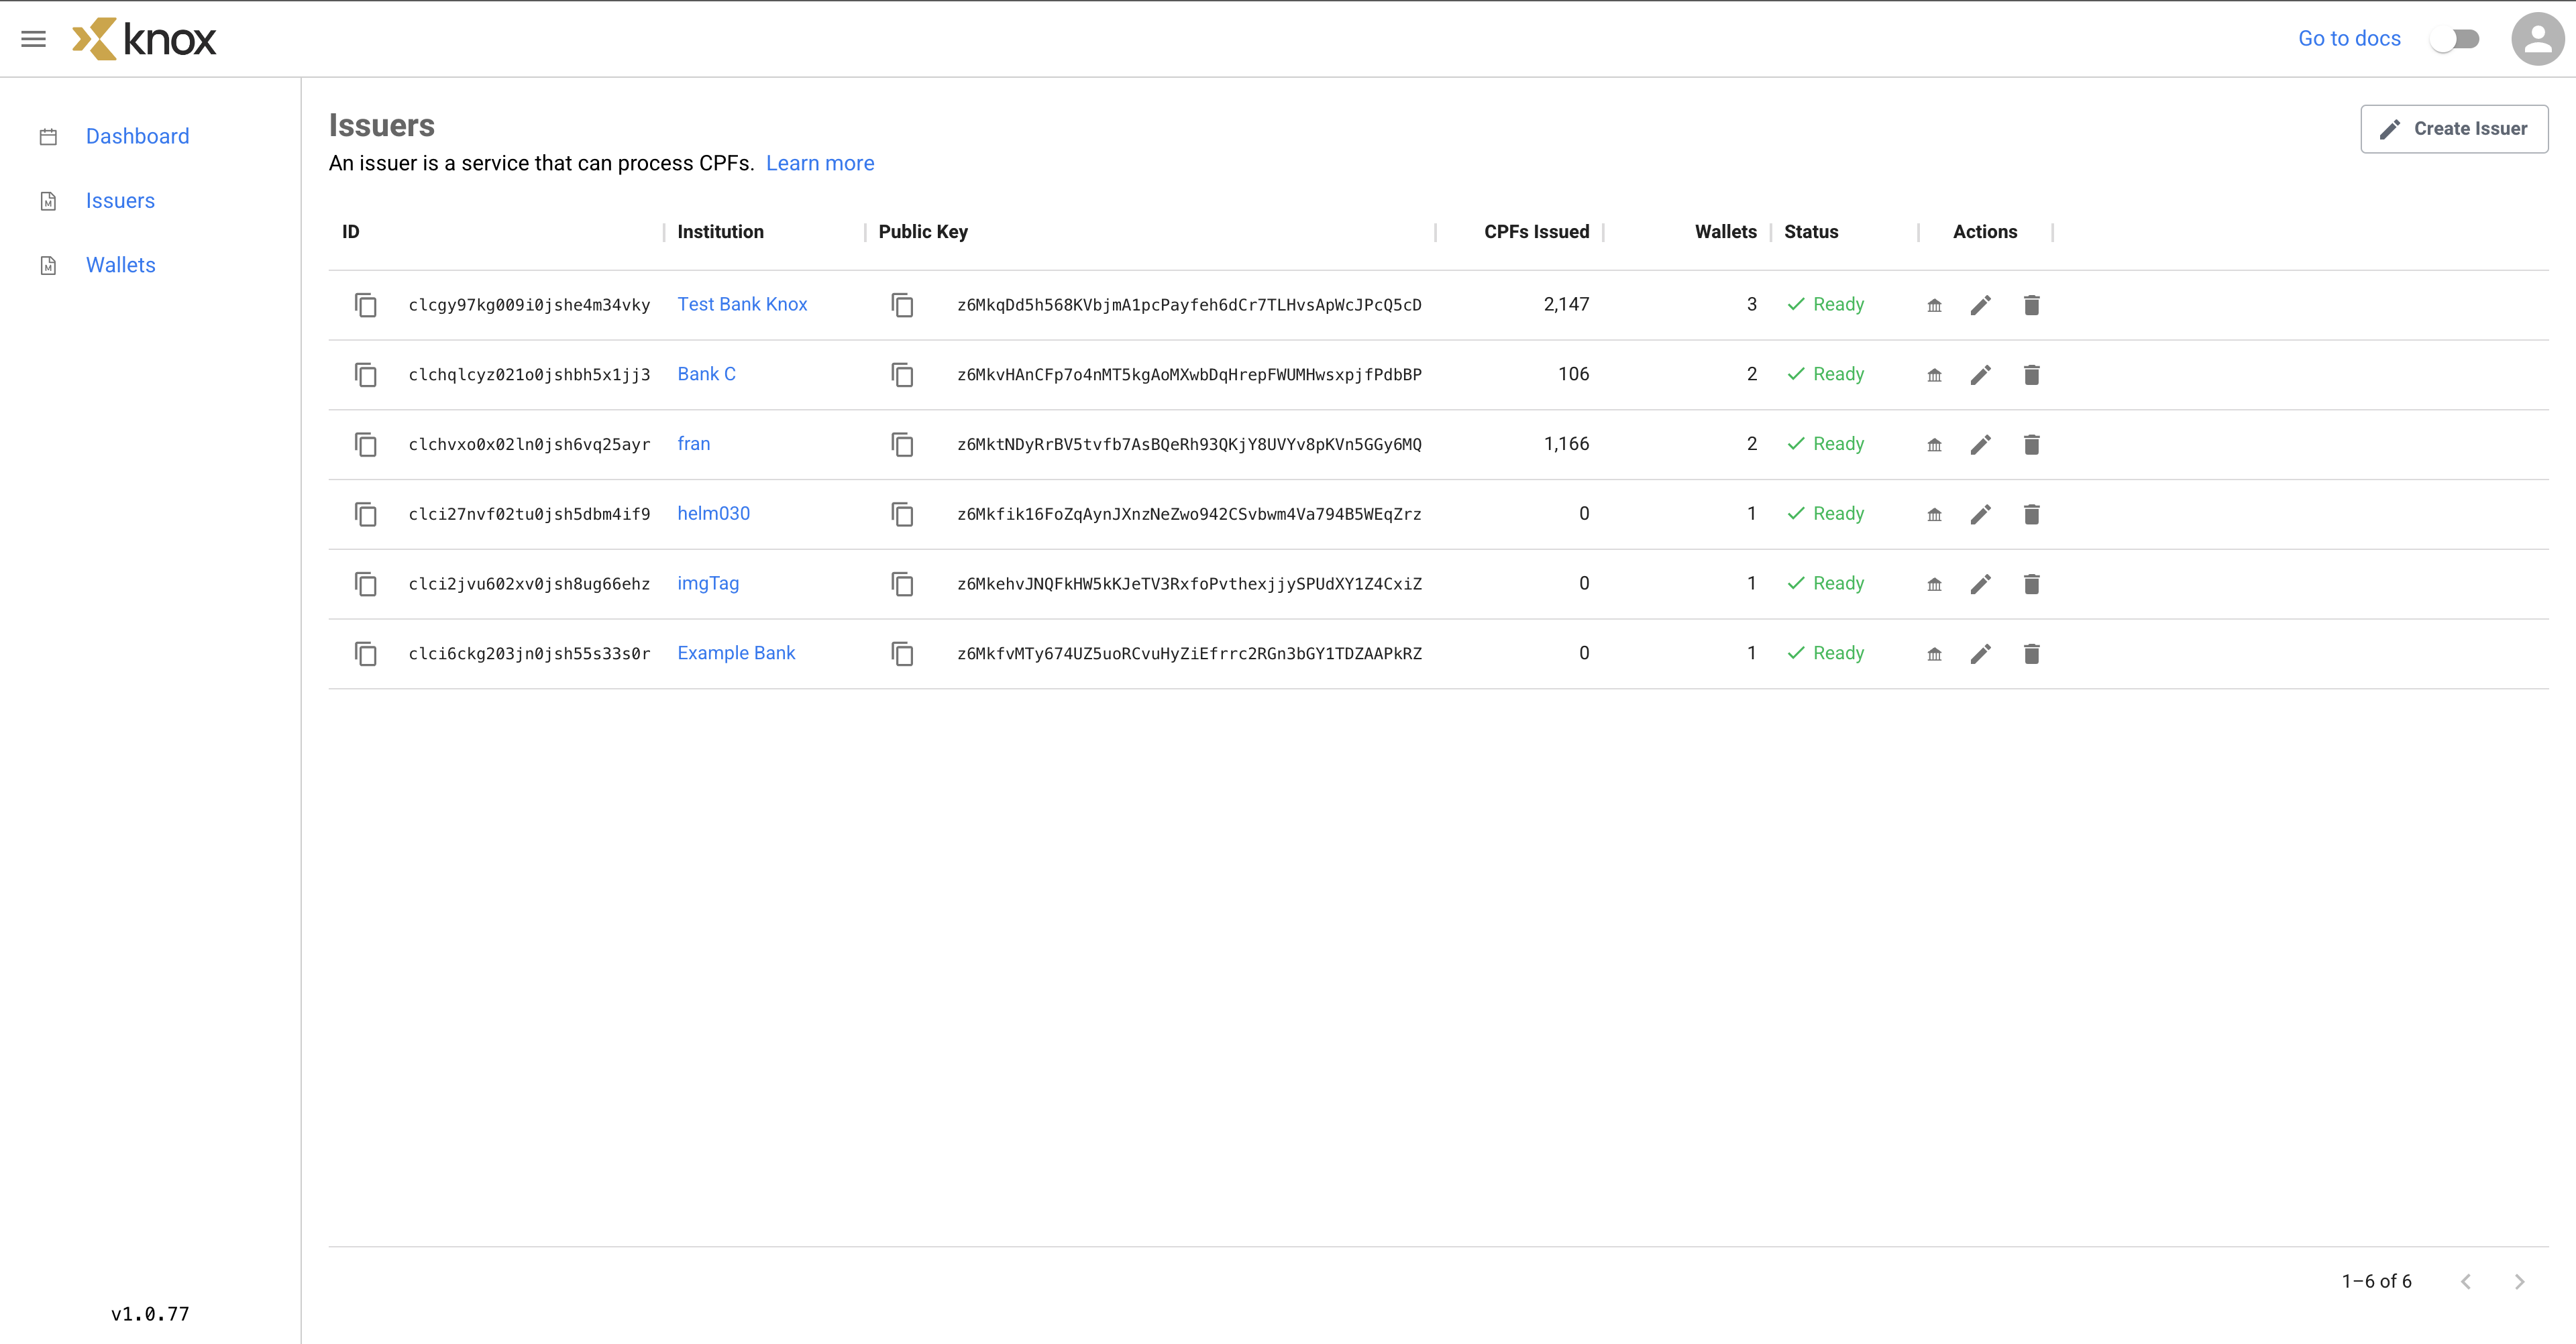
This is our created Authorized Intermediary, which is shown with associated fields such as the ID, Public Key, the number of CPFs (files) minted and Wallets managed, and its status. Ours will likely have the status Creating... for a few seconds.
The Actions column also allows us to mock a sample login portal for the DFI, edit the DFI's name, or delete the DFI entirely if we so choose.
Step 2: Examining the Intermediary
We can click on Example Bank after it has been initialized (this may take a few seconds as the Intermediary gets created).
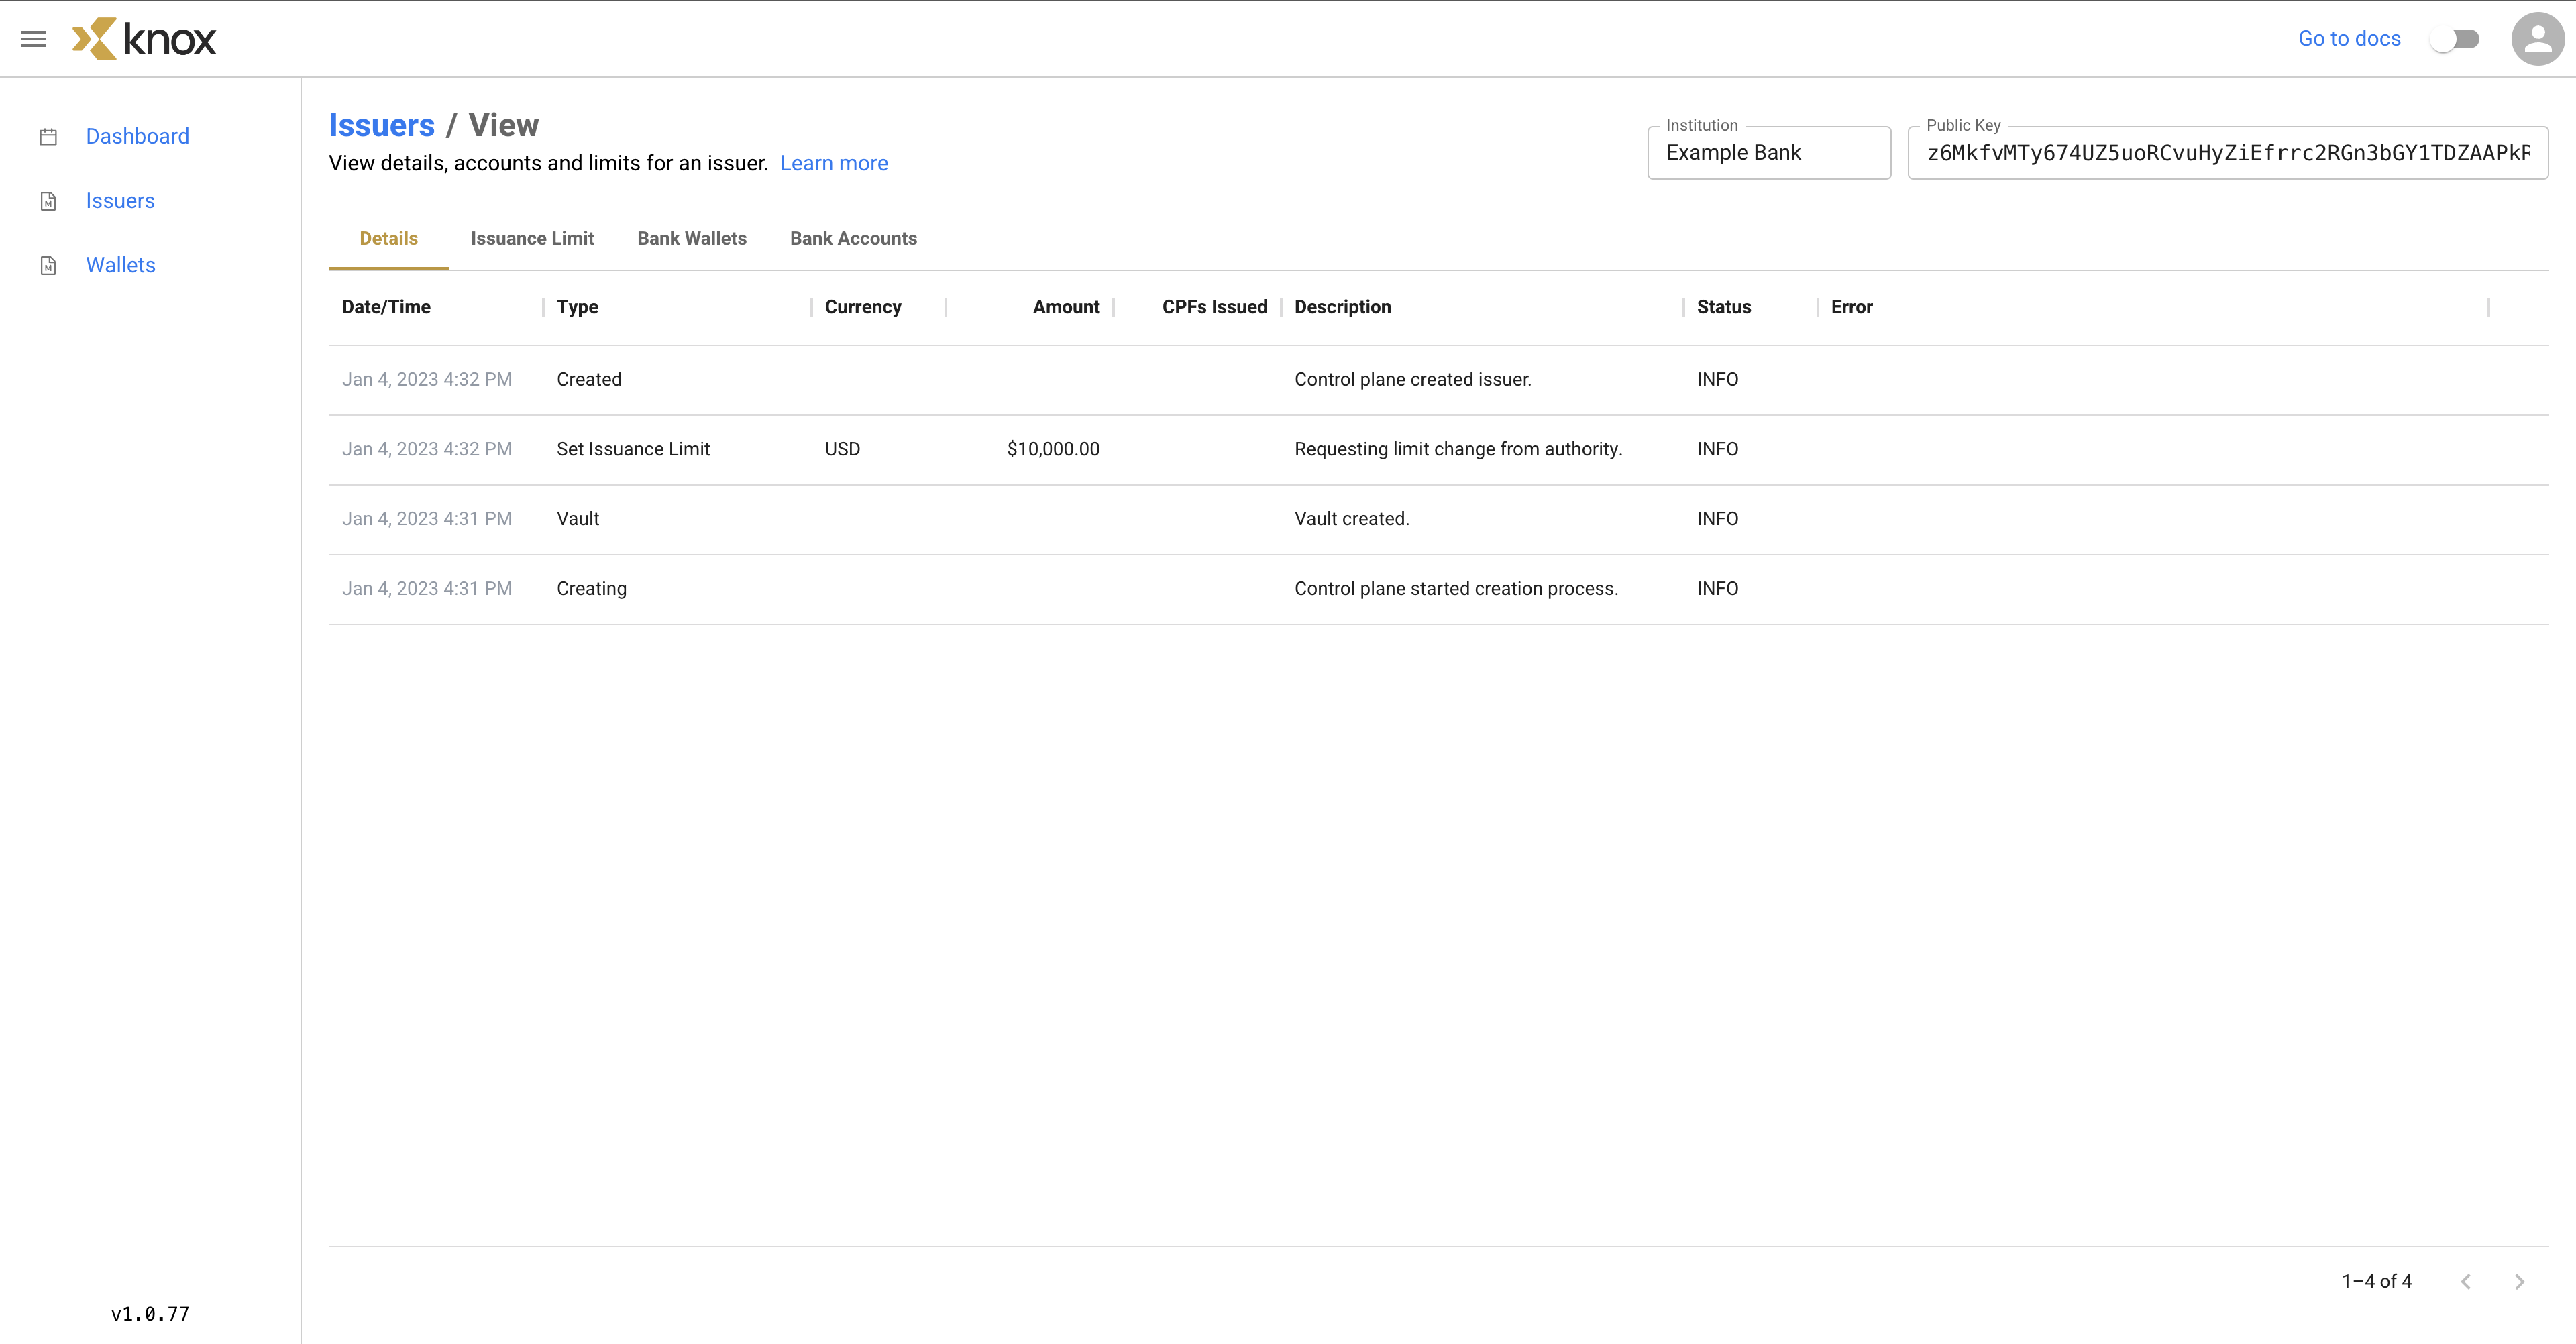
This is the main view of the DFI. Here, we can see the most recent details of the DFI's actions. Since we just created the DFI, it's pretty sparse in terms of activity. We can see that the DFI was created, an initial distribution limit pf $10,000.00 set, and a wallet called Vault created.
If we click on the Distribution Limit tab, we can see the current available distribution limit, which is affected by the amount of files minted and redeemed. In addition, we can also see the number of CPFs distributed.
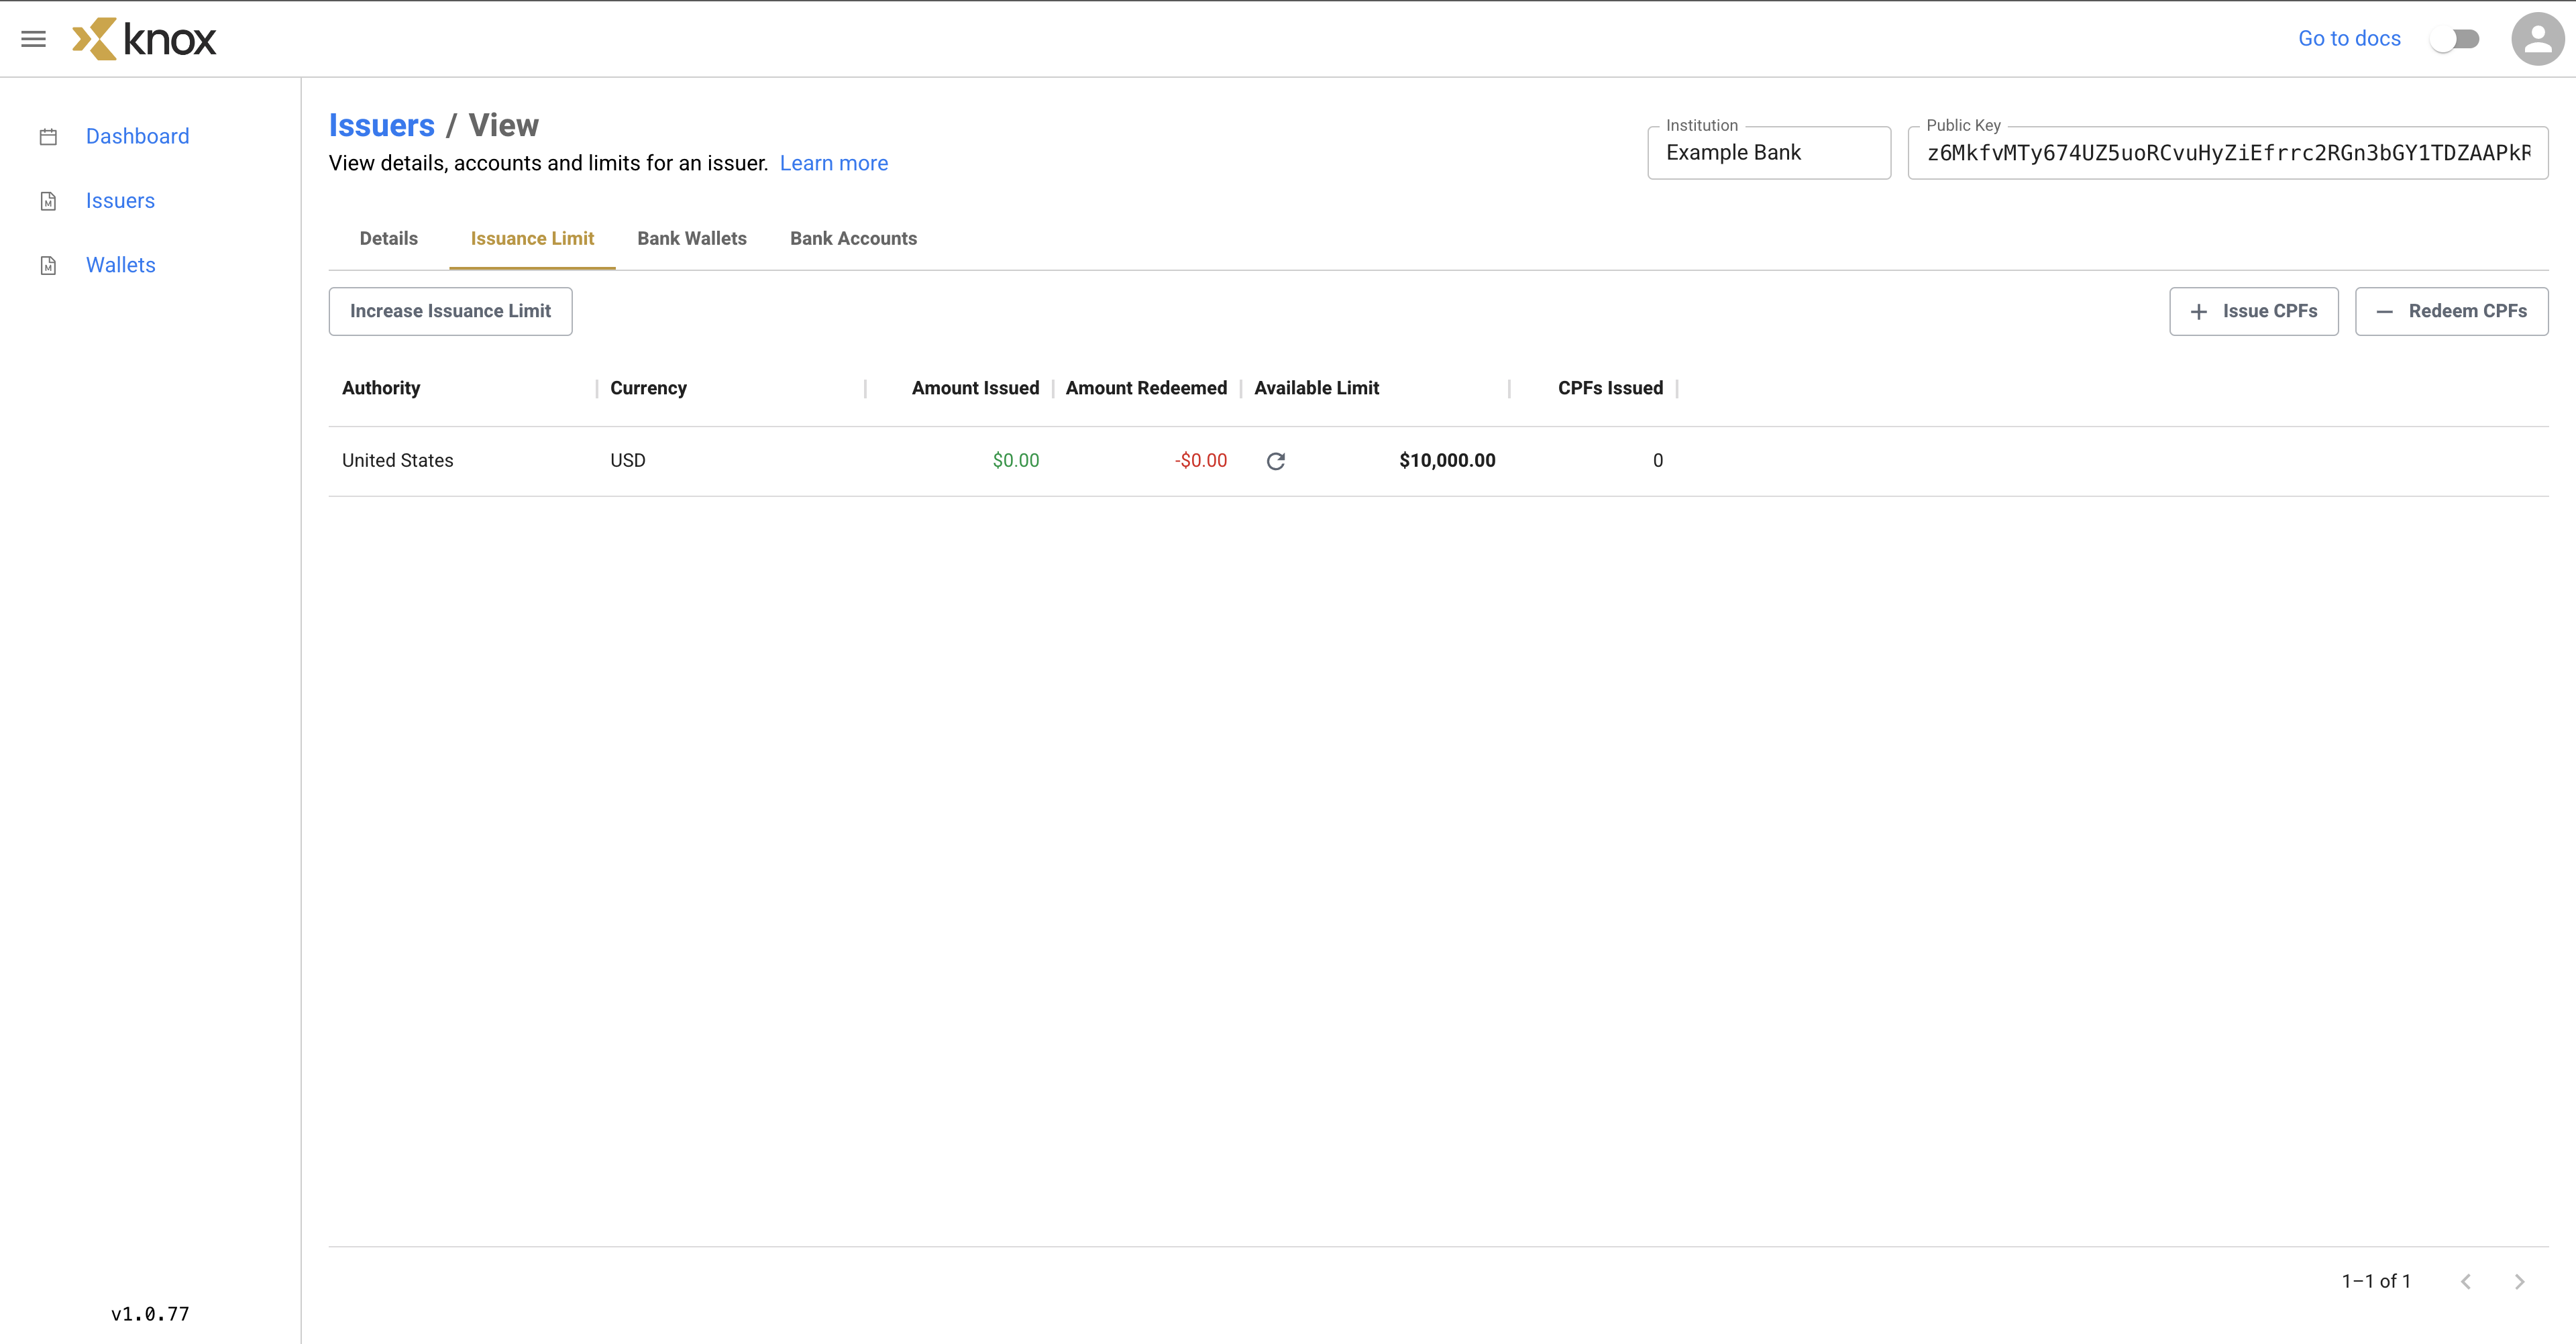
Since we haven't distributed anything, it's still at an available limit of $10,000.00. This tab will also be where we will managed the distribution and redemption of CPFs in future
Next, let's click on the Bank Wallets tab. Here, we can see all of the wallets that are created and managed under this particular DFI.
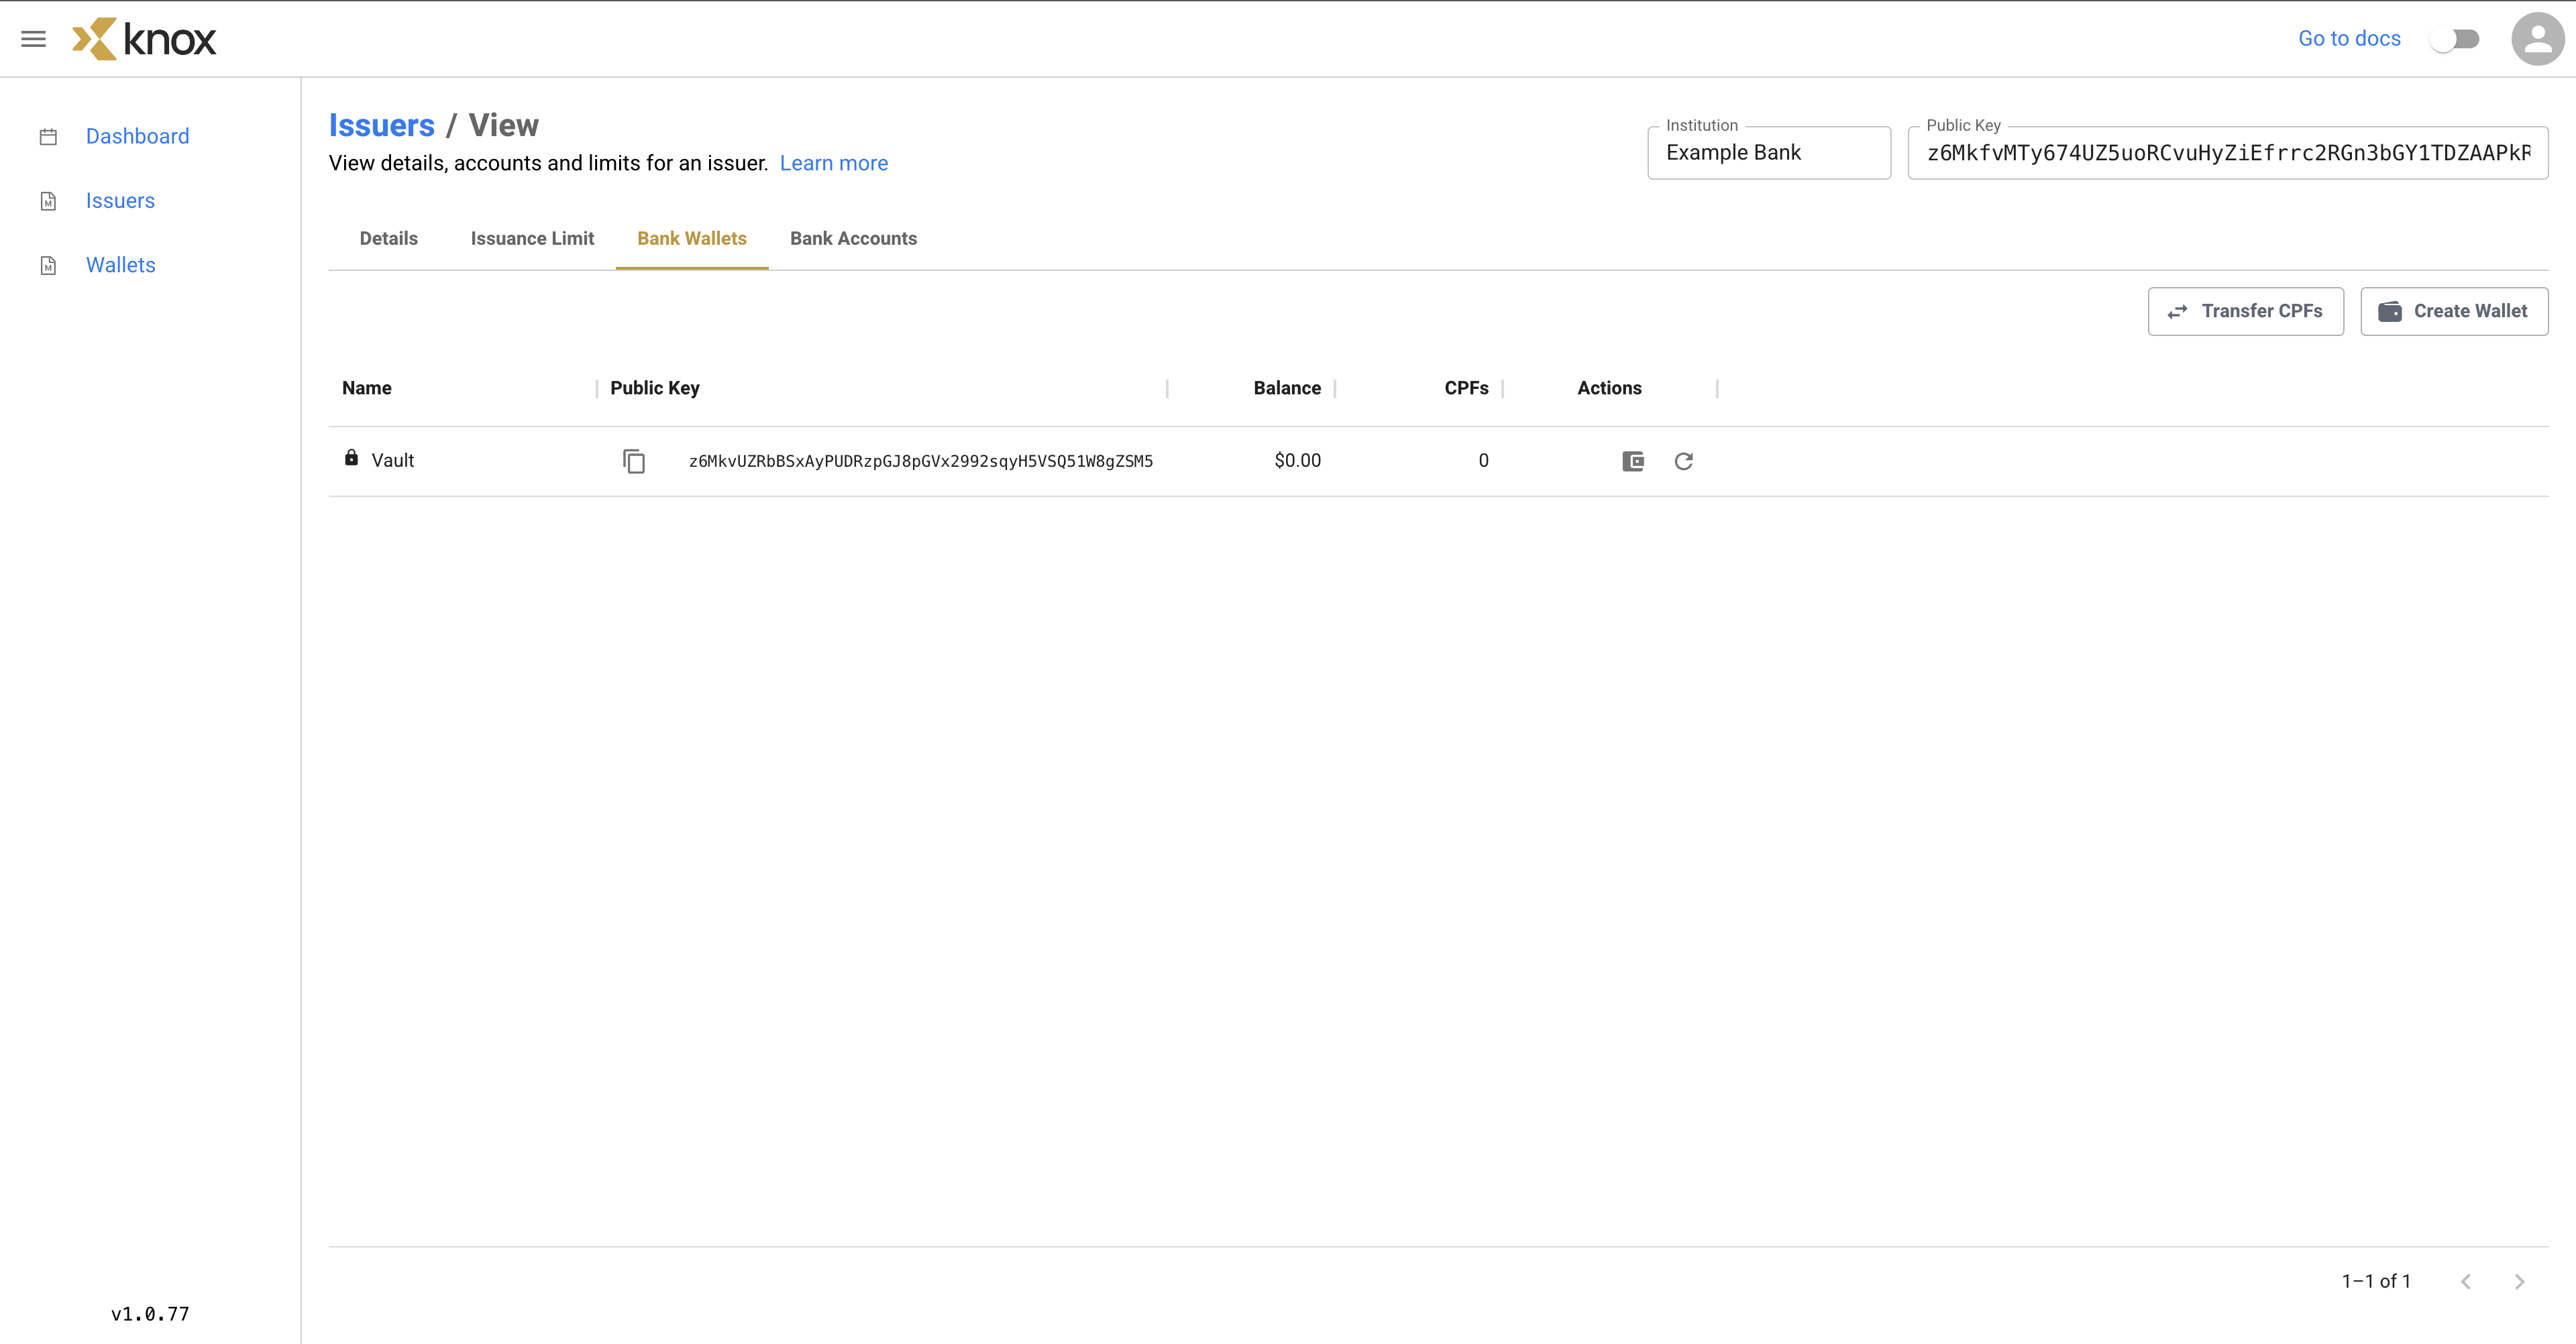
We only have our Vault wallet, which serves as a default wallet for DFI's. For each wallet, we can also see the Public Key, the Balance, and the number of CPFs in the wallet. On the Actions column, we can rename the wallet (for wallets other than the Vault), inspect the wallet contents, and refresh the status of the wallet.
Finally, let's check out the Bank Accounts tab.
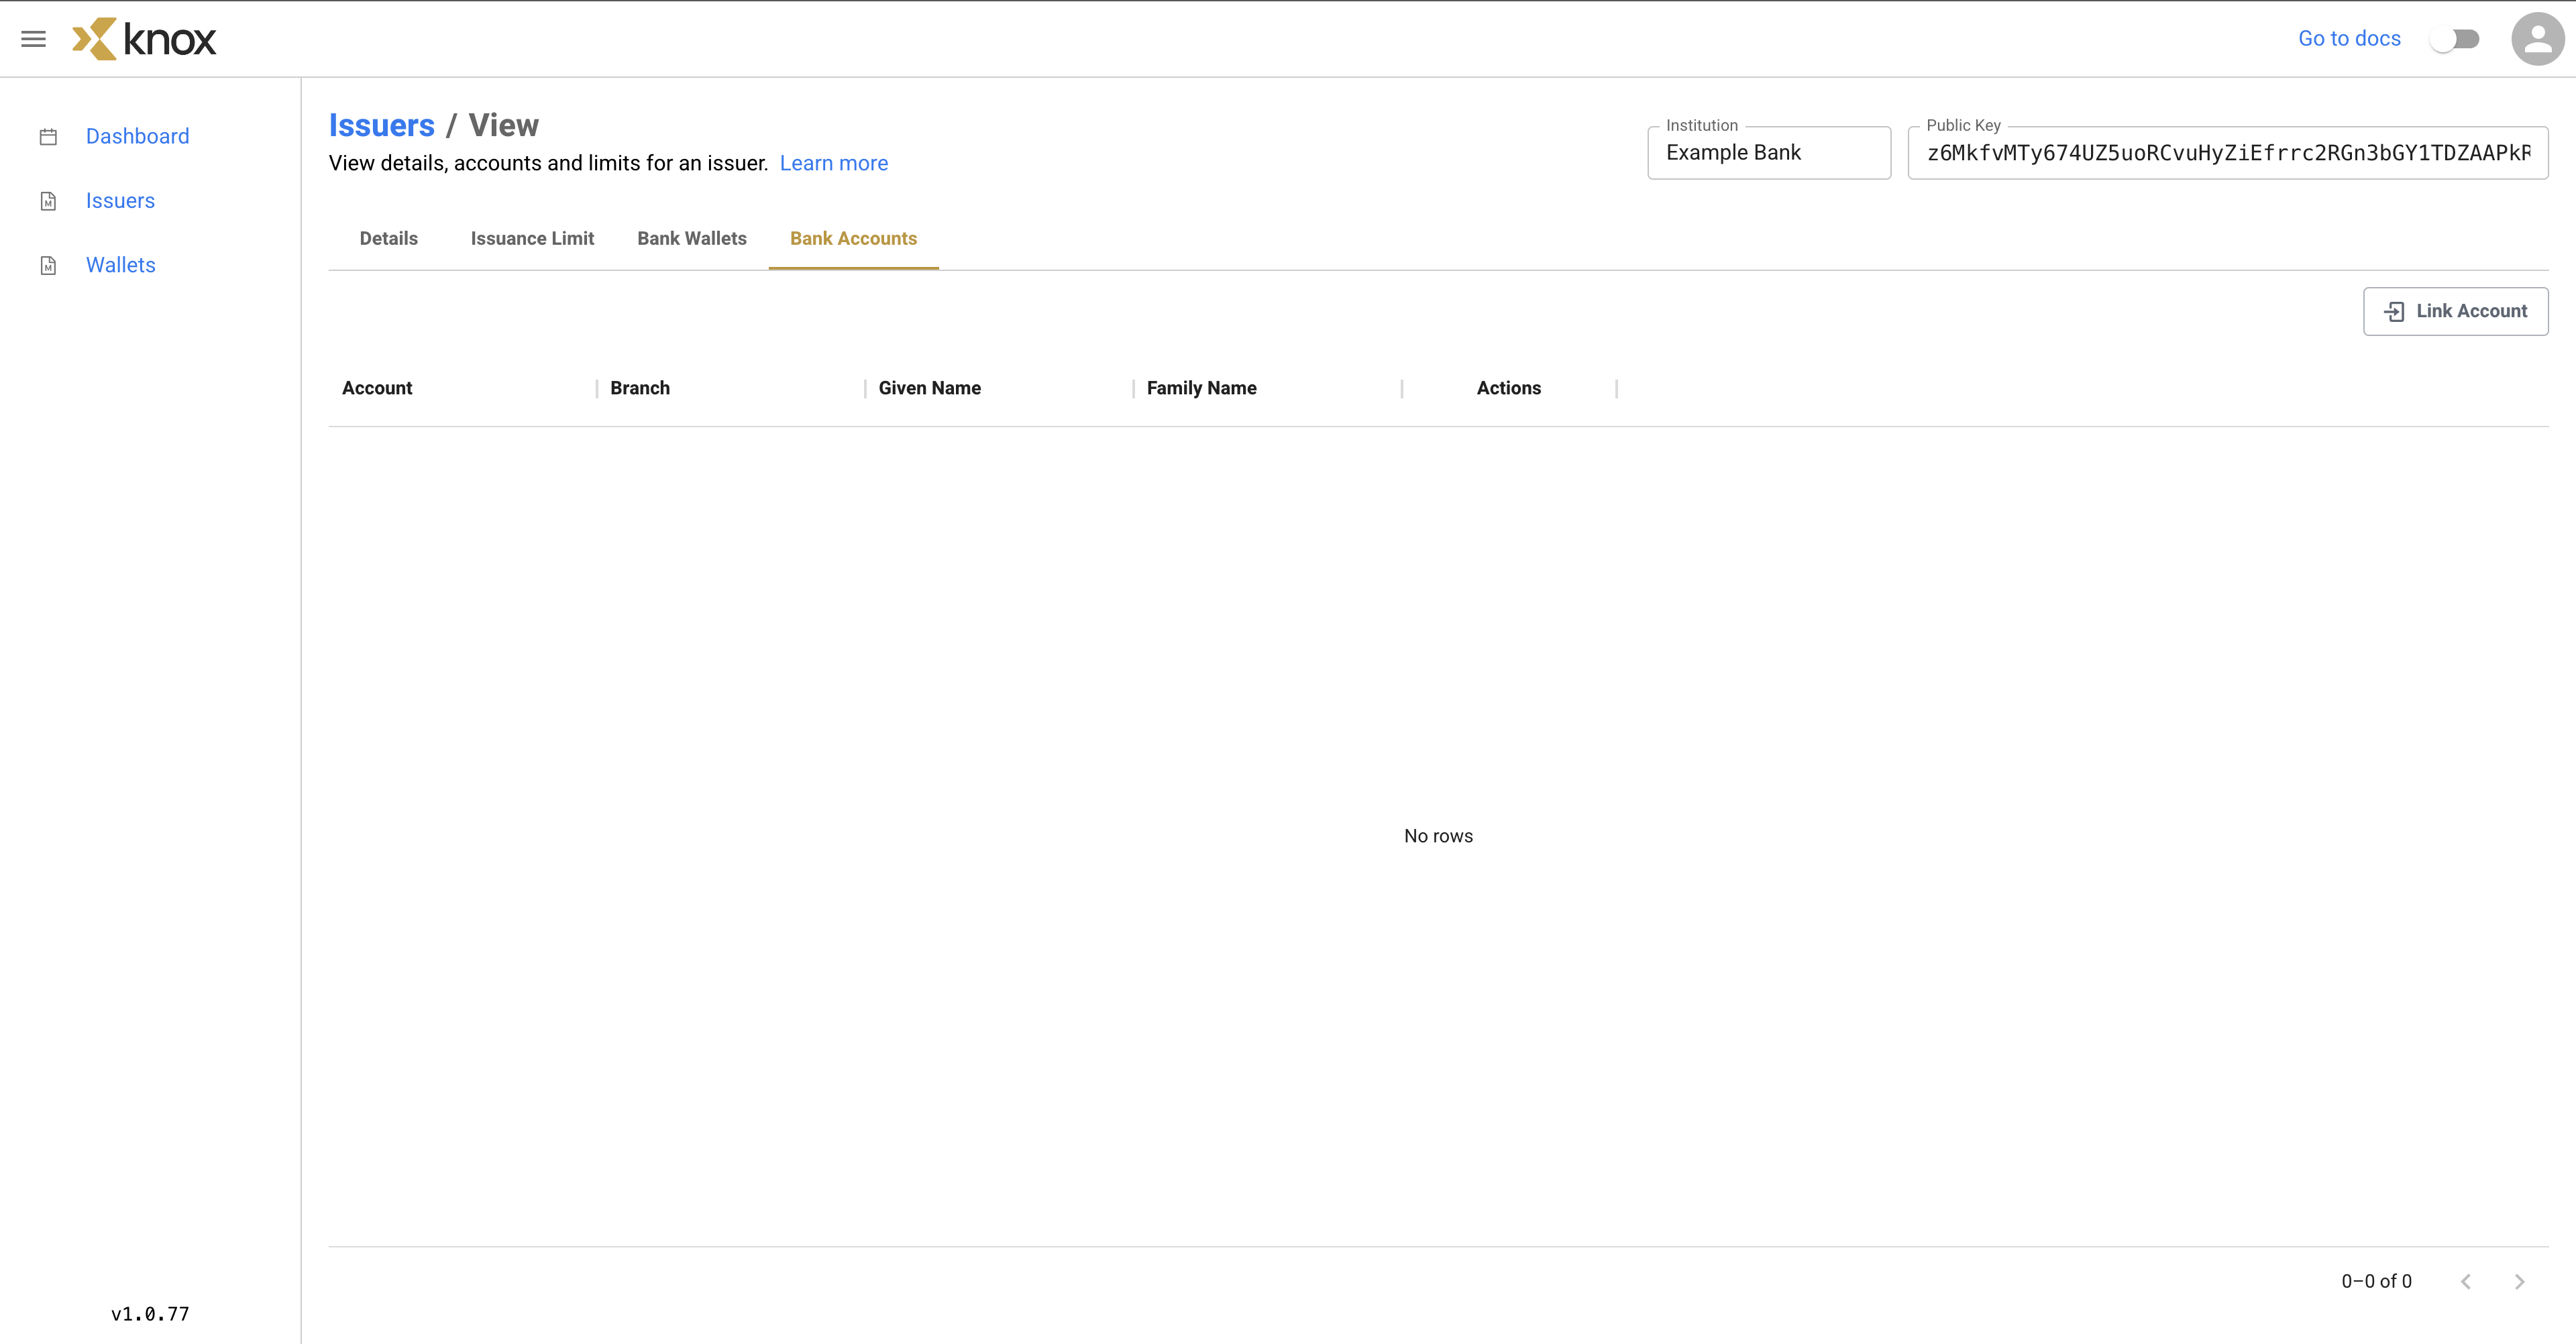
This page is a little sparse right now, but will eventually be populated with linked bank accounts representing customers' bank accounts that correspond to wallets Link Account.
Summary
In this Knox Networks Sandbox tutorial, we went through the process of creating an Authorized Intermediary named Example Bank with an distribution limit of $10,000.00. A default wallet called Vault was created alongside the Authorized Intermediary. Lastly, we explored around the Authorized Intermediary.
Updated 4 months ago