
Tutorial 2: Create Wallet
Create a Wallet Tutorial
In this Knox Networks Sandbox tutotiral, we will walk through the process of creating a wallet named Alice's Wallet under a DFI called Sample Bank. We'll then inspect inside this newly created wallet.
Step 1: Creating a New Intermediary
Let's create a new Authorized Intermediary like in the Tutorial 1: Create Intermediary called Sample Bank with a distribution limit of $5,000.00.
After Sample Bank is good to go, let's click on it.
Step 2: Creating a Wallet
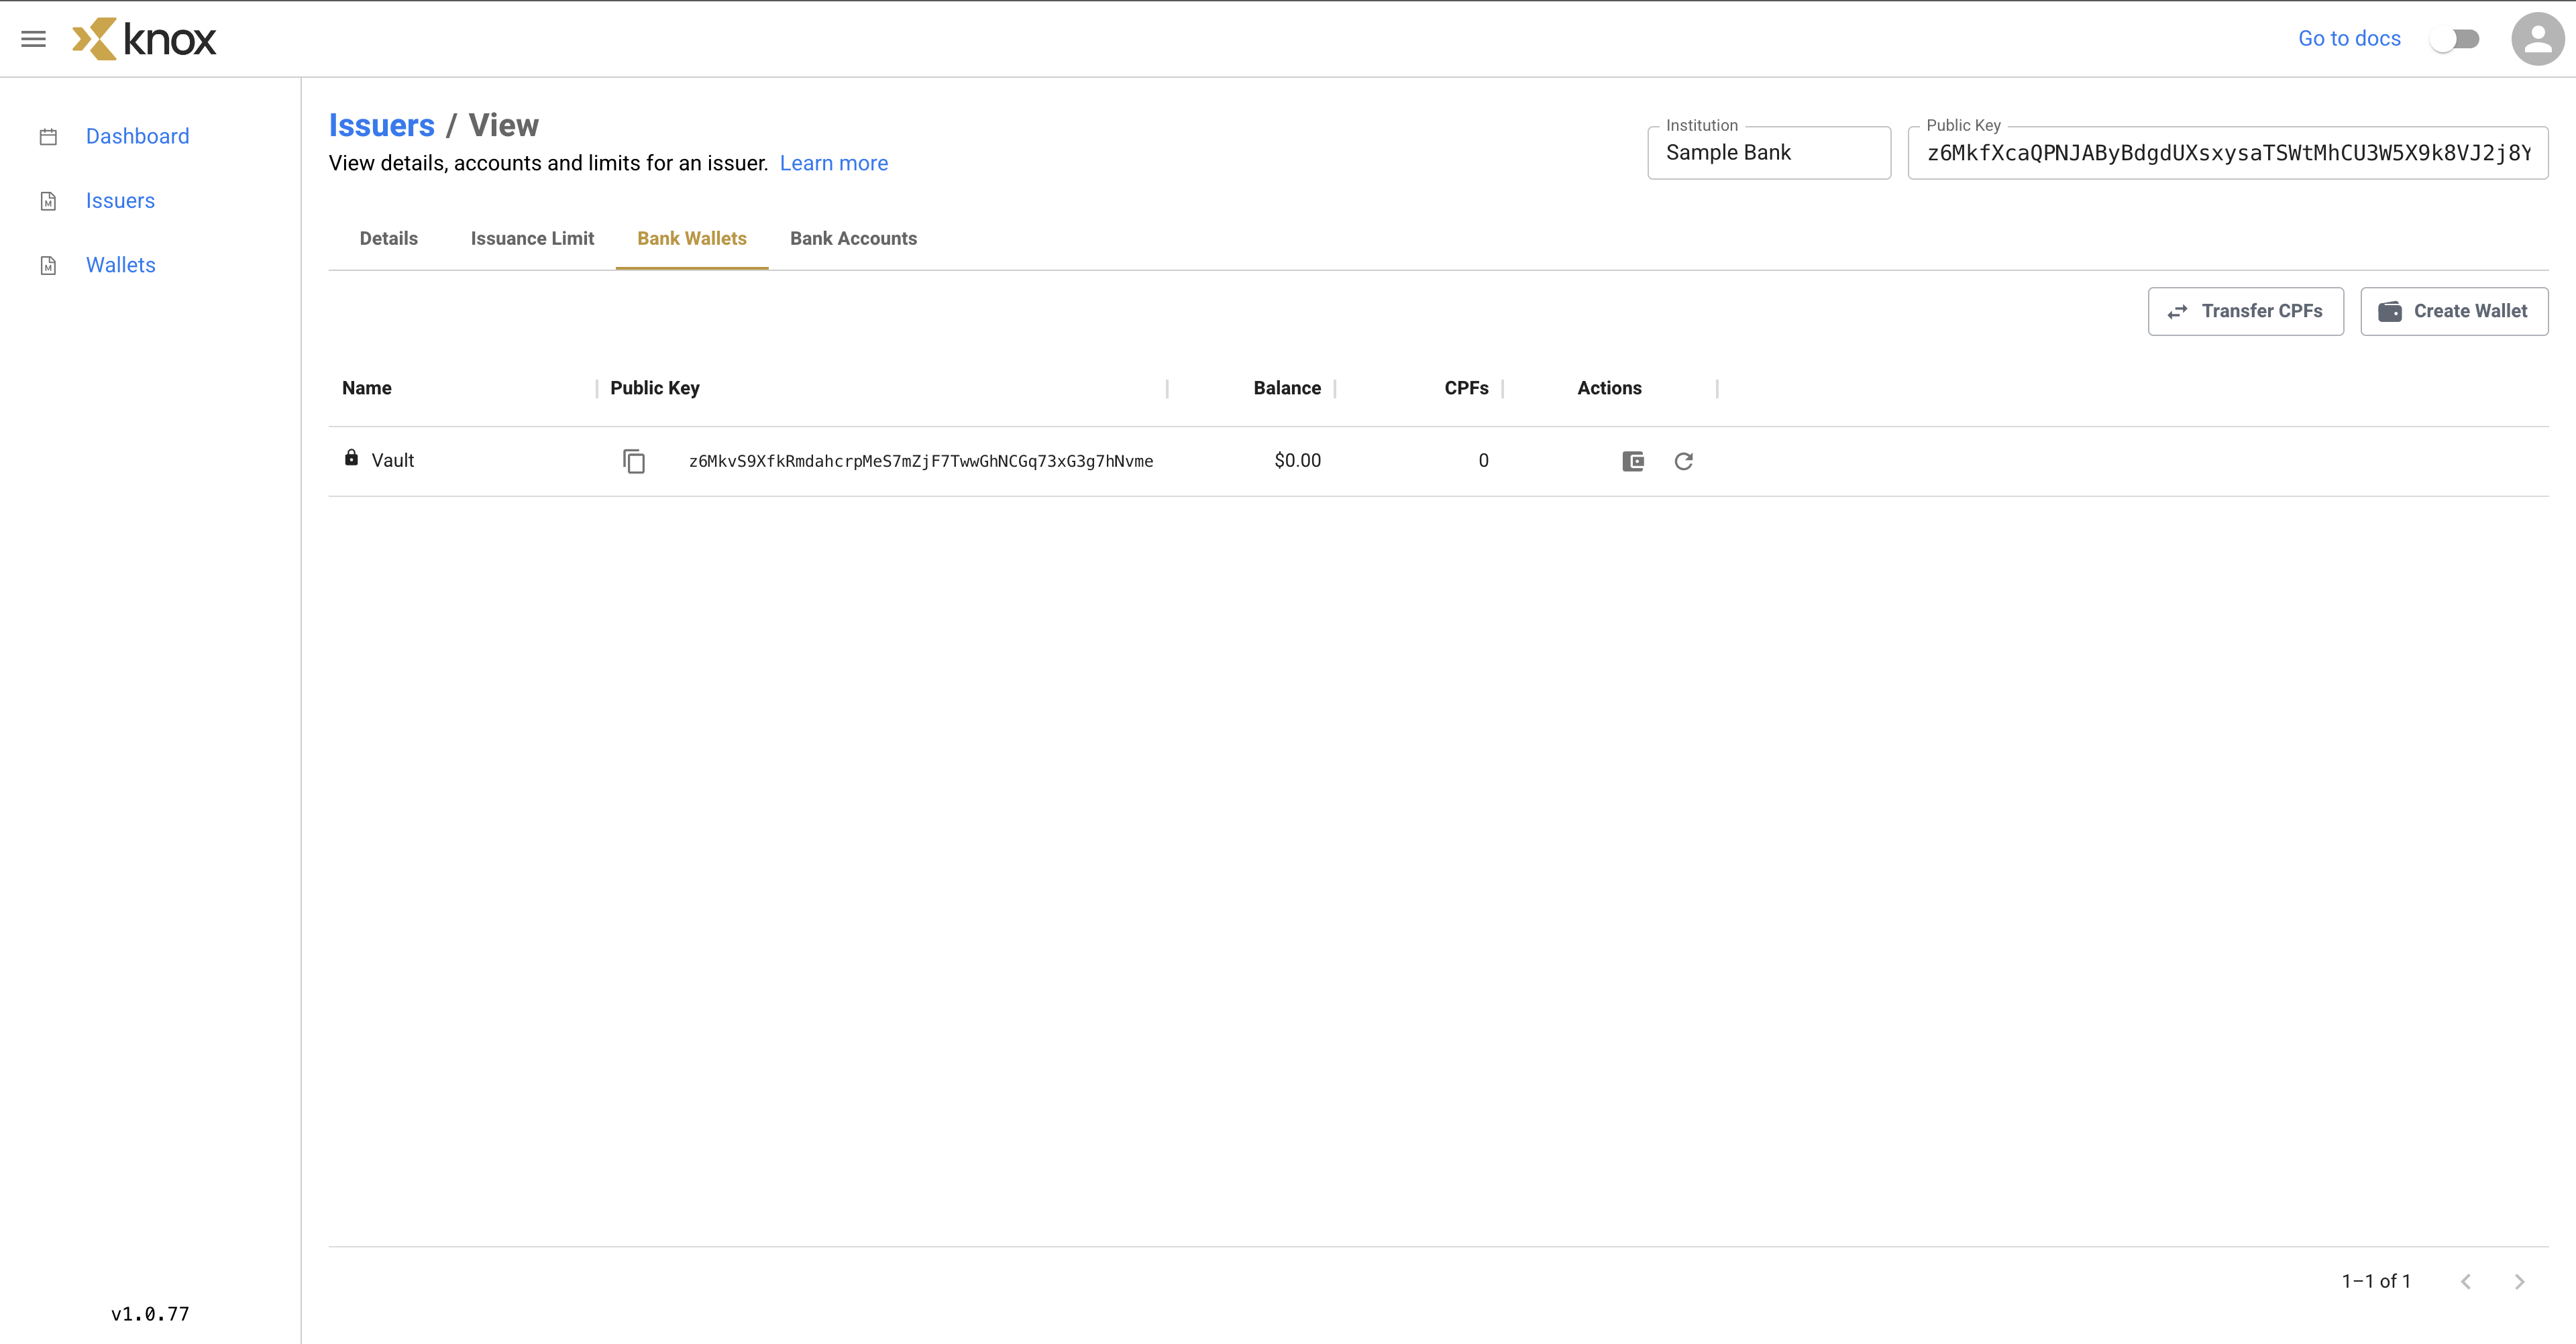
From here, let's go to the Bank Wallets tab. Here, you can see another Vault wallet was created for the Sample Bank by default, which is currently empty without any CPFs.
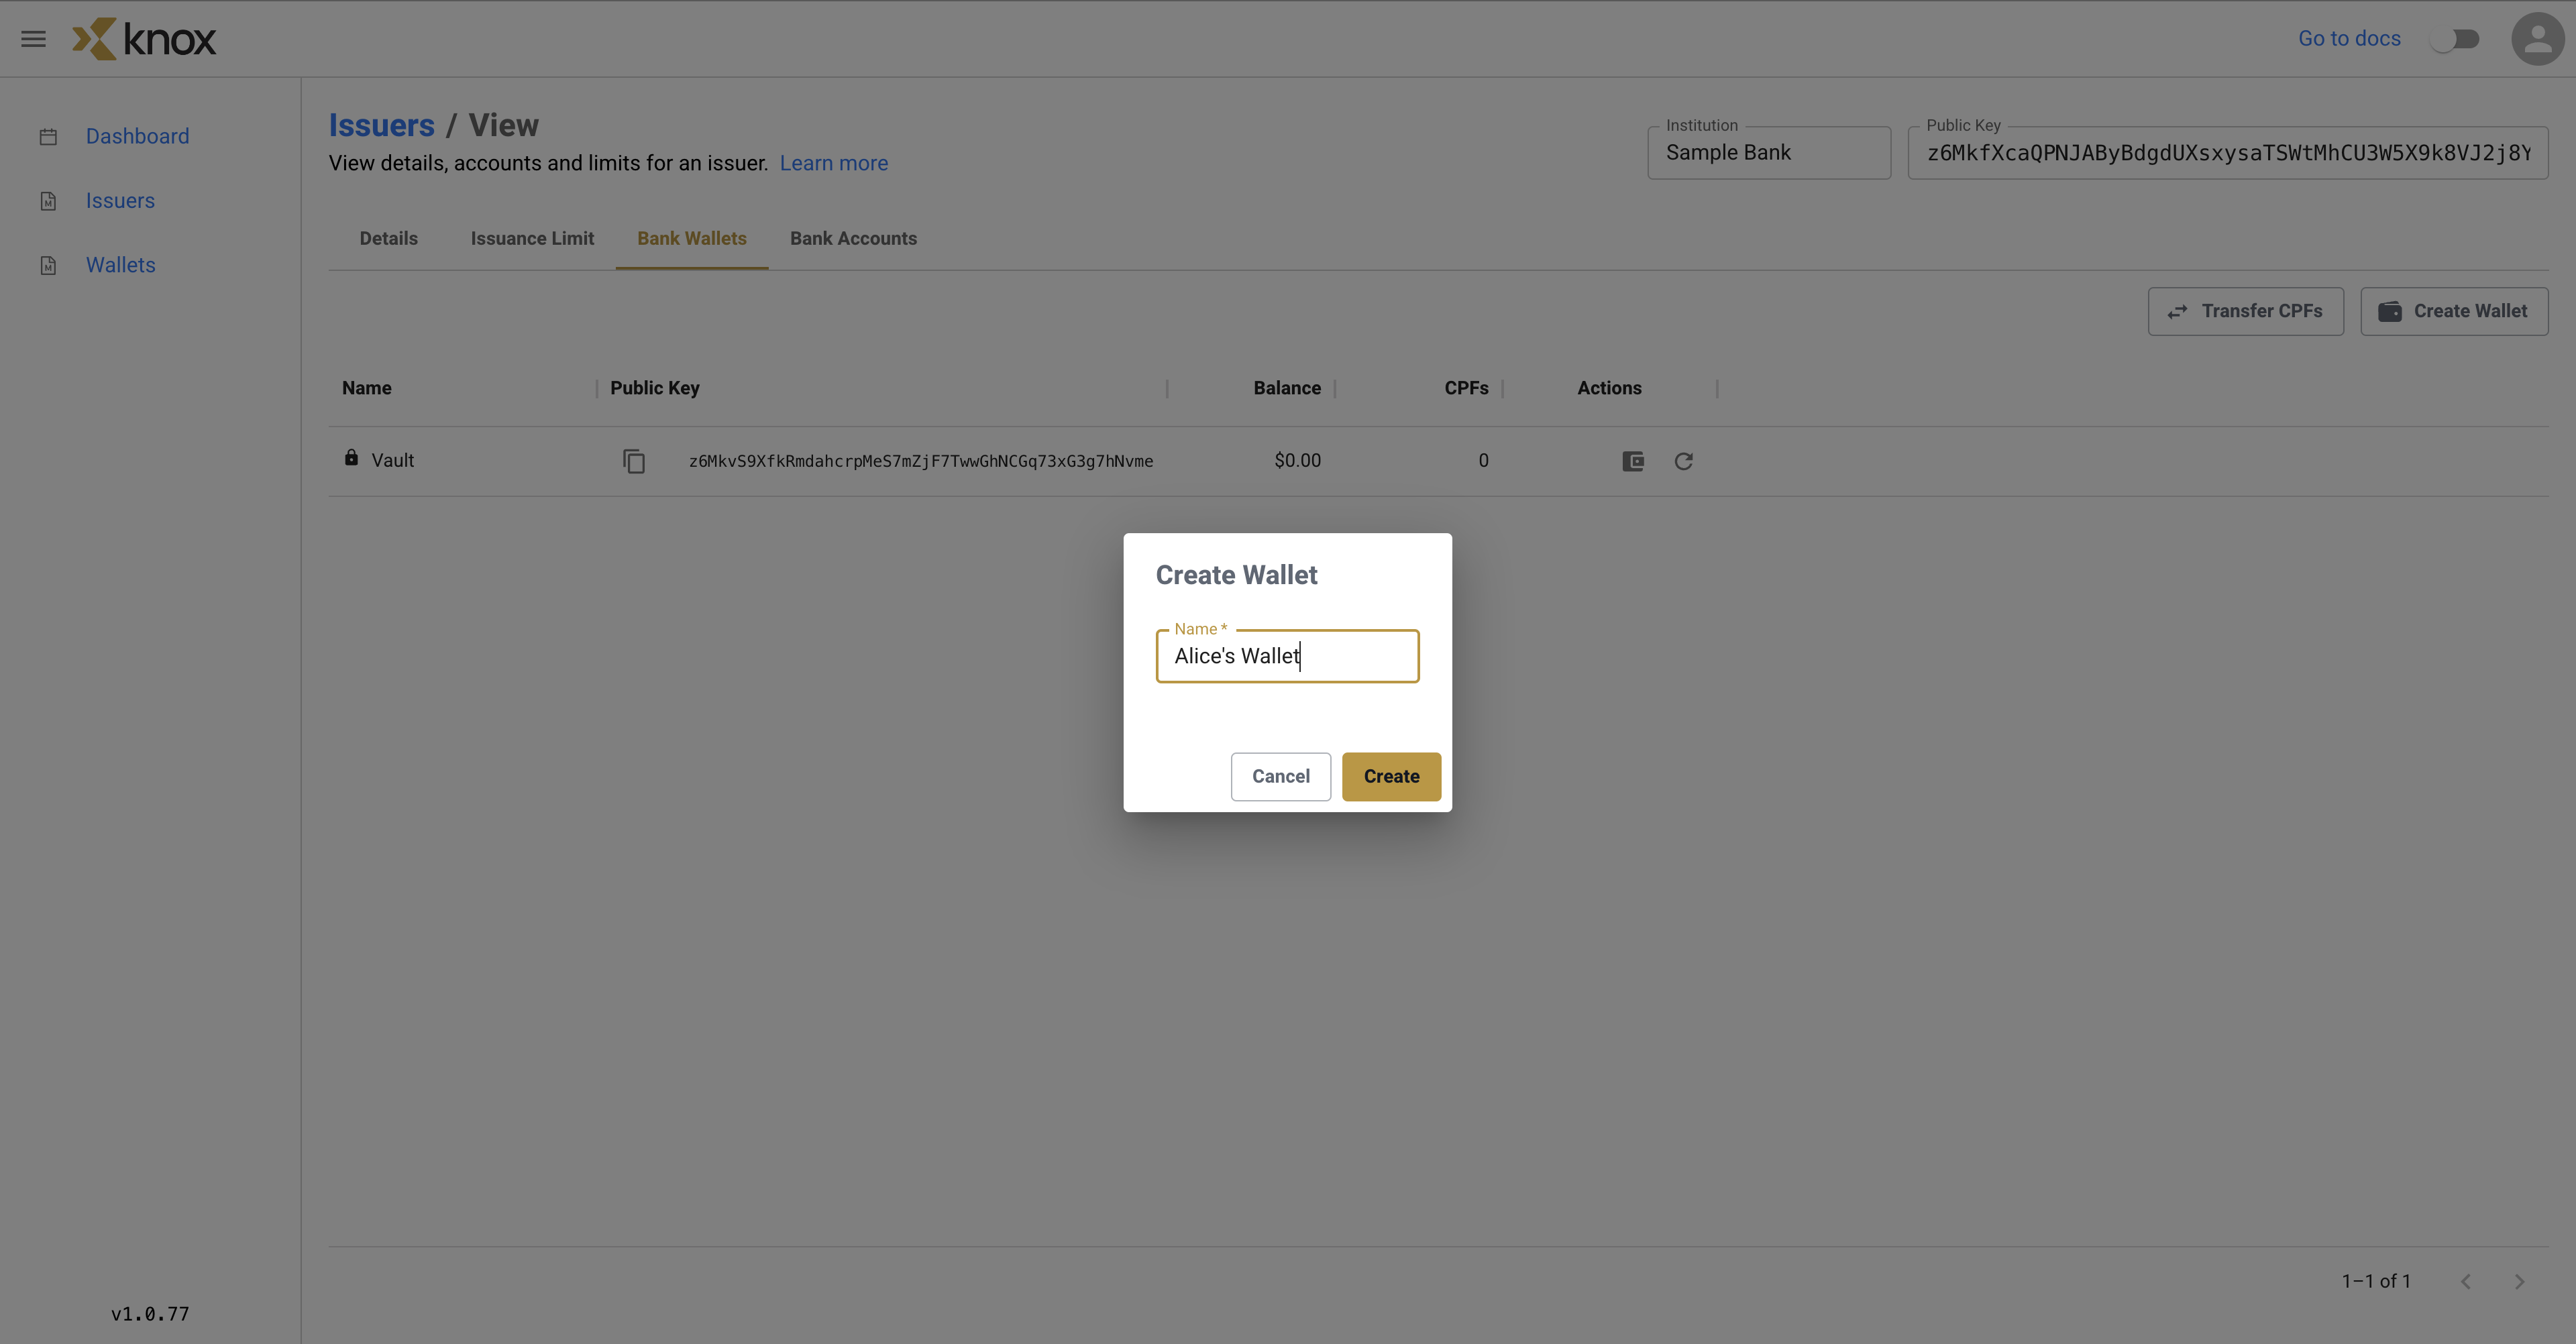
But we are not limited to just one wallet. Let's click on the Create Wallet button in the top right. Let's name this wallet Alice's Wallet.
Awesome! Now our Receiving Bank has 2 separate wallets, one default one called Vault and one custom one called Alice's Wallet.
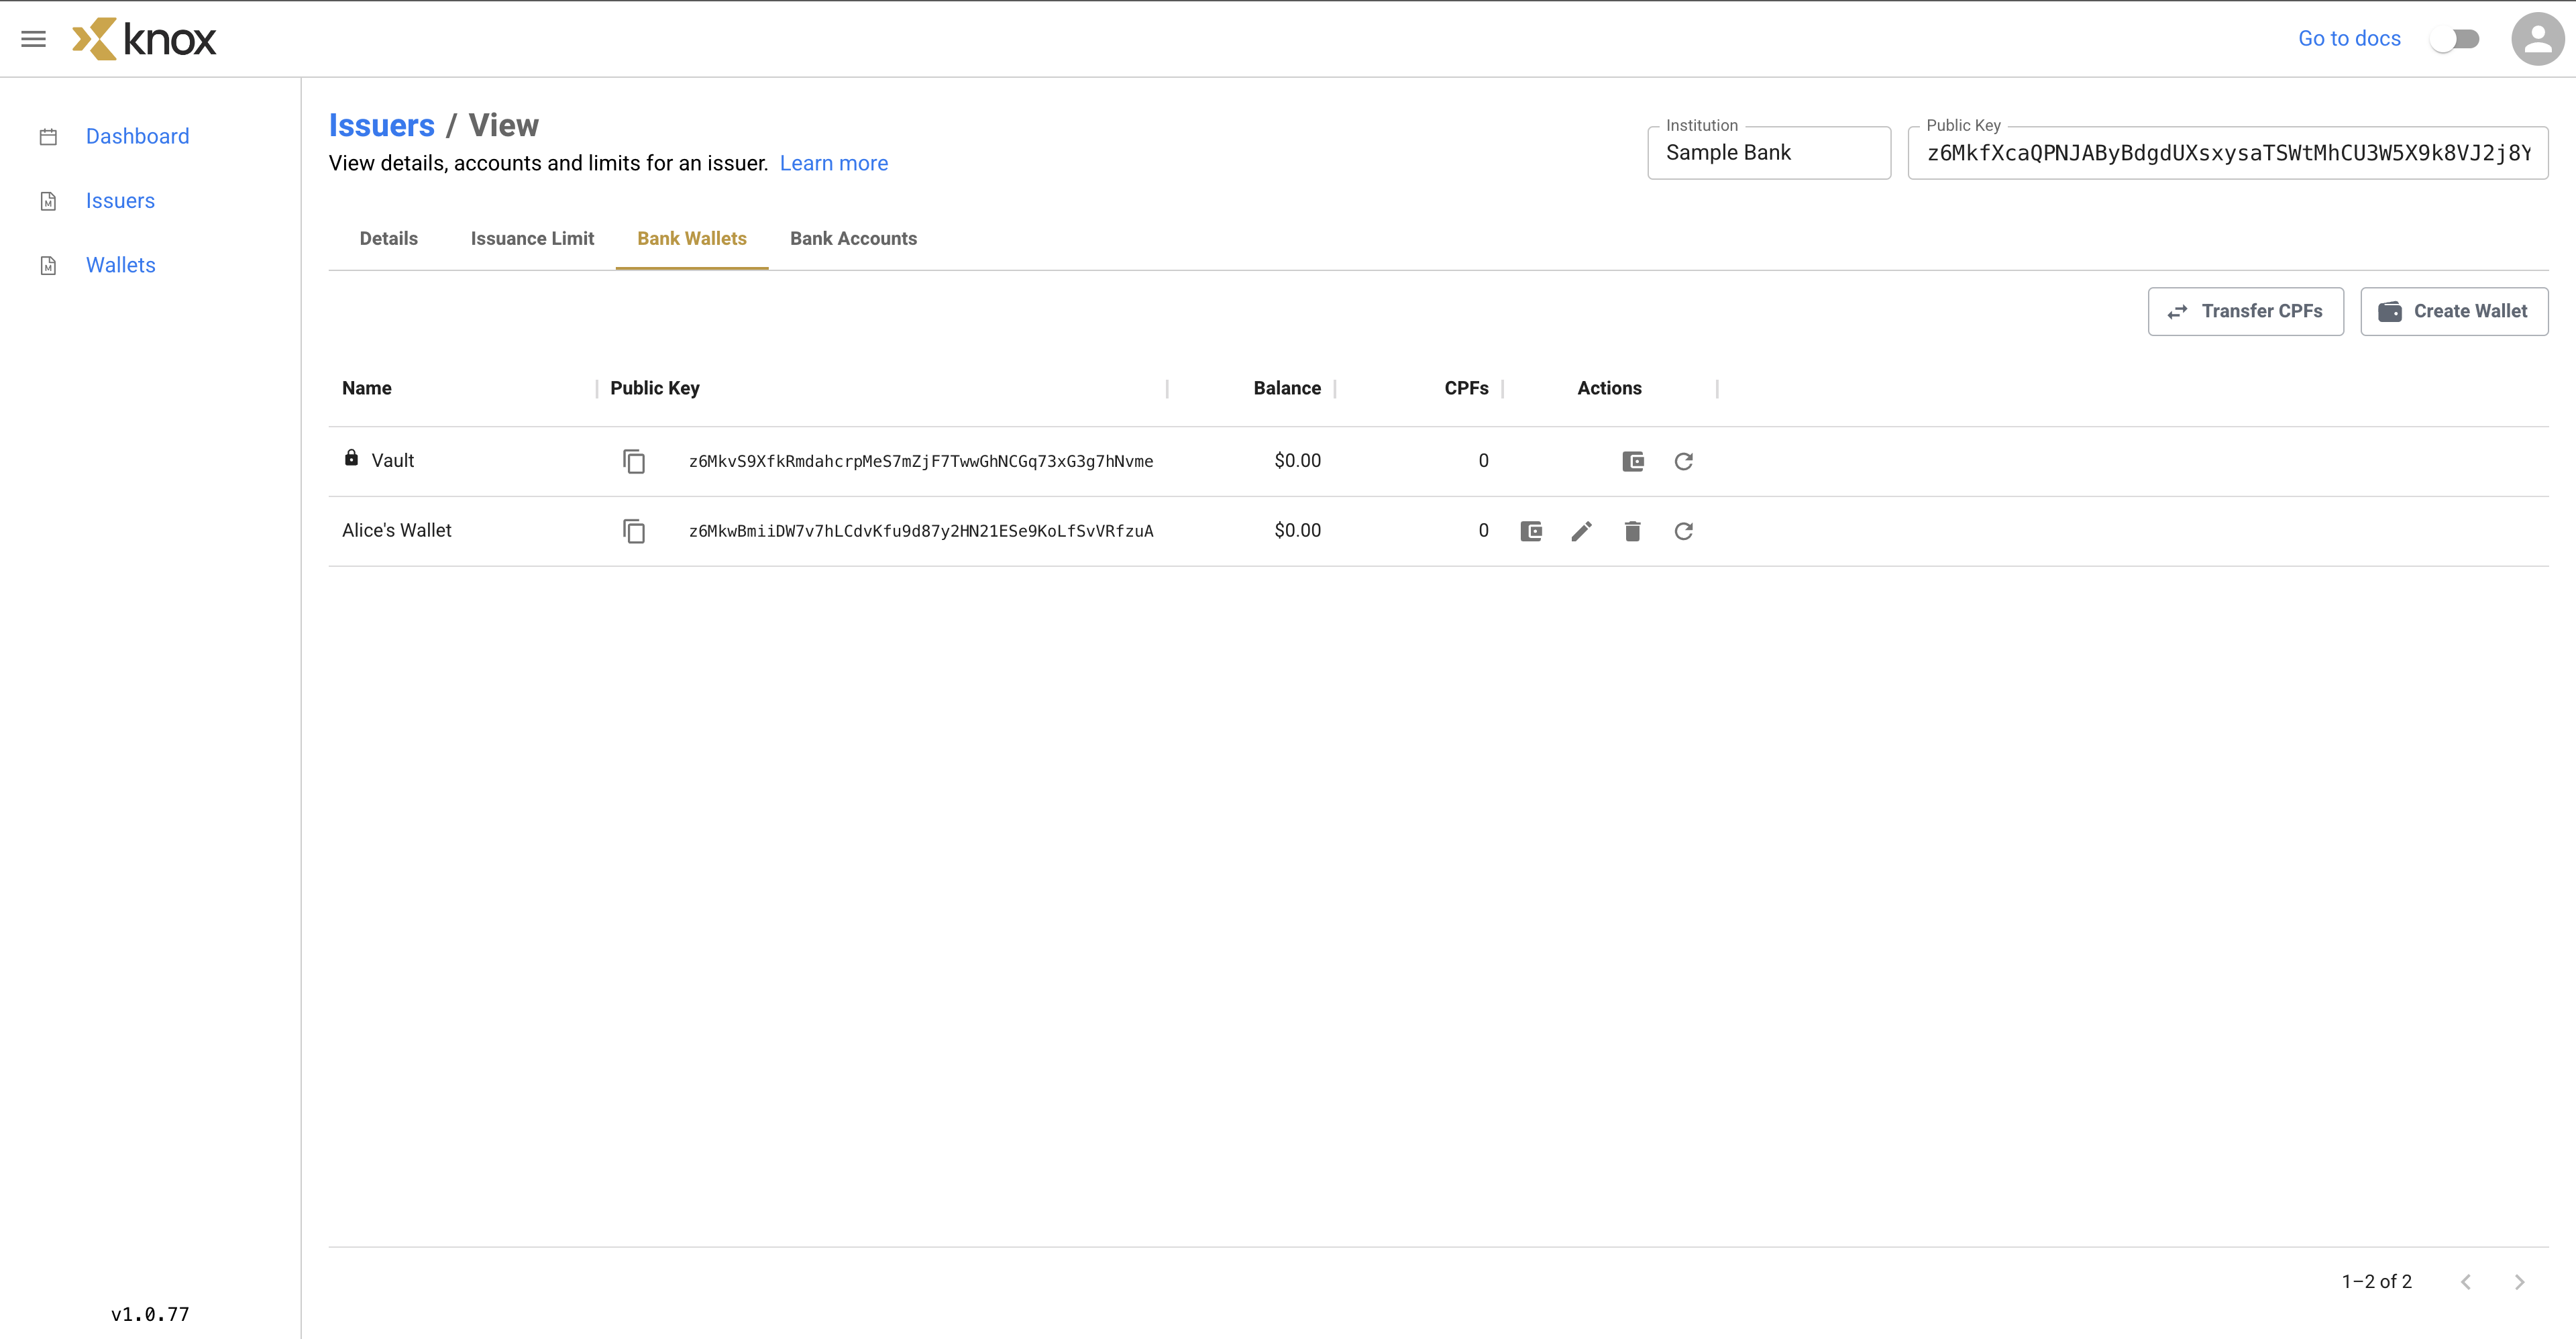
For the custom wallets, we can also change the name of the wallet by clicking the Edit icon and delete the wallet using the Trash if we so choose. But for now, let's keep the name as it is now.
Step 3: Peek Inside the Wallet
Let's click on the details icon to see what's inside the wallet.
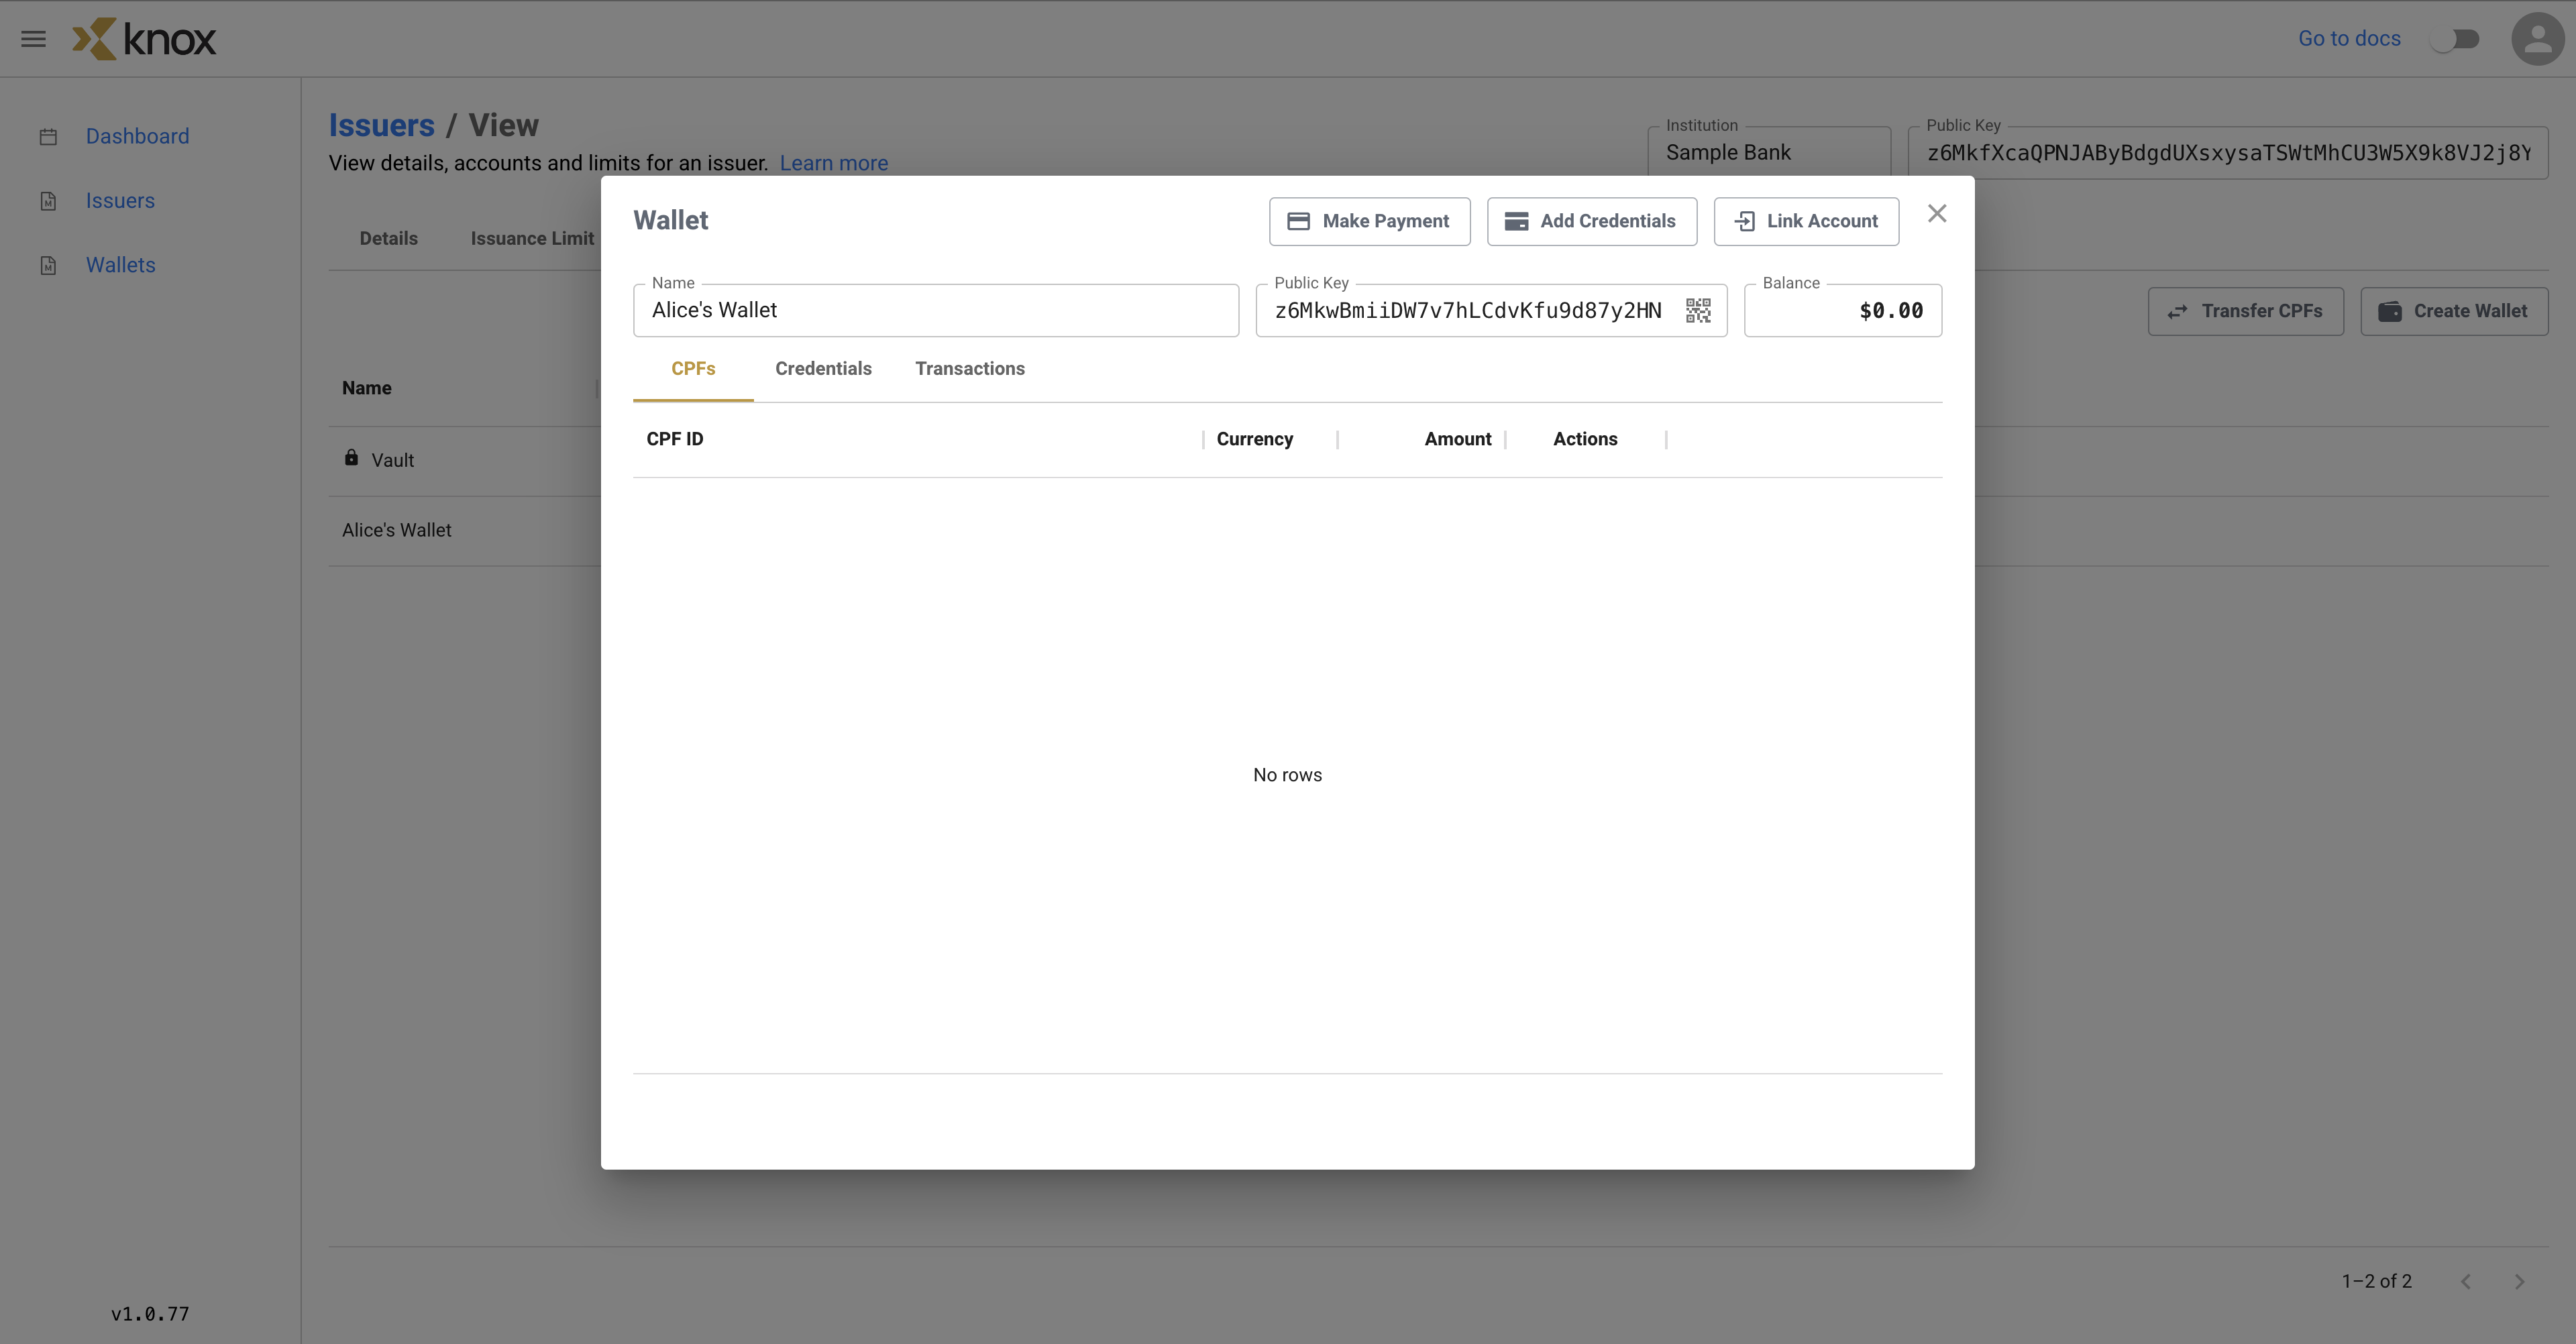
Currently, the wallet is empty, but once it has CPFs, we'll be able to explore any transactions that the wallet makes. In addition, we'll soon explore the adding of VCs to the wallet as a digital identity proof of concept.
Summary
In this tutorial, we walked through the process of creating a wallet named Alice's Wallet under a DFI called Sample Bank. We then explored inside Alice's (currently empty) wallet.
Updated 4 months ago