
Tutorial 3: Distribution Payment Redemption
Distribution-Payment-Redemption Tutorial
In this Knox Networks Sandbox tutorial, we will walk through the process of creating a Authorized Intermediary named Example Bank with a distribution limit of $10,000.00. A default wallet called Vault will be created alongside the Authorized Intermediary.
From there, we will then distributed $100.00 worth of FBDAs to the Vault wallet. This will decrease our Example Bank's available distribution limit by $100.00 down to $9,900.00. We will then explore the Vault wallet's CPFs.
Next, we'll show how to create another bank called Sample Bank with a distribution limit of $5,000.00. We'll then create a wallet within Sample Bank creatively named Sample Wallet. This wallet had no CPFs.
After returning to our Example Bank, we'll initiate a payment of $15.00 worth of CPFs from the Vault to the Sample Bank's Sample Wallet. This will decrease the balance on the Example Bank's wallet and will increase the balance on the Sample Bank's wallet. We will then verify that this transfer has taken place at the individual file level.
Step 1: Setting up Authorized Intermediaries and Wallets
For this tutorial, we will need to create Authorized Intermediaries:
Example Bankwith a distribution limit of$10,000.00 USDSample Bankwith a distribution limit of$5,000.00 USDand a created wallet calledAlice's Wallet
The tutorial will still work with different names and distribution limit values, but this is suggested for the simplicity of the tutorial. Please refer to the tutorials on Tutorial 1: Create Intermediary and Tutorial 2: Create Wallet for the tutorials of creating a DFI and creating a wallet respectively.
Step 2: Distributing a CPF
Let's click on Example Bank and go to the Distribution Limit tab. Here we will be able to distribute and redeem Cryptographic Promissory Files (CPFs). CPFs serve as the basic unit of accounting in the Knox Networks system, and represent a fixed-denomination currency or general asset unit.
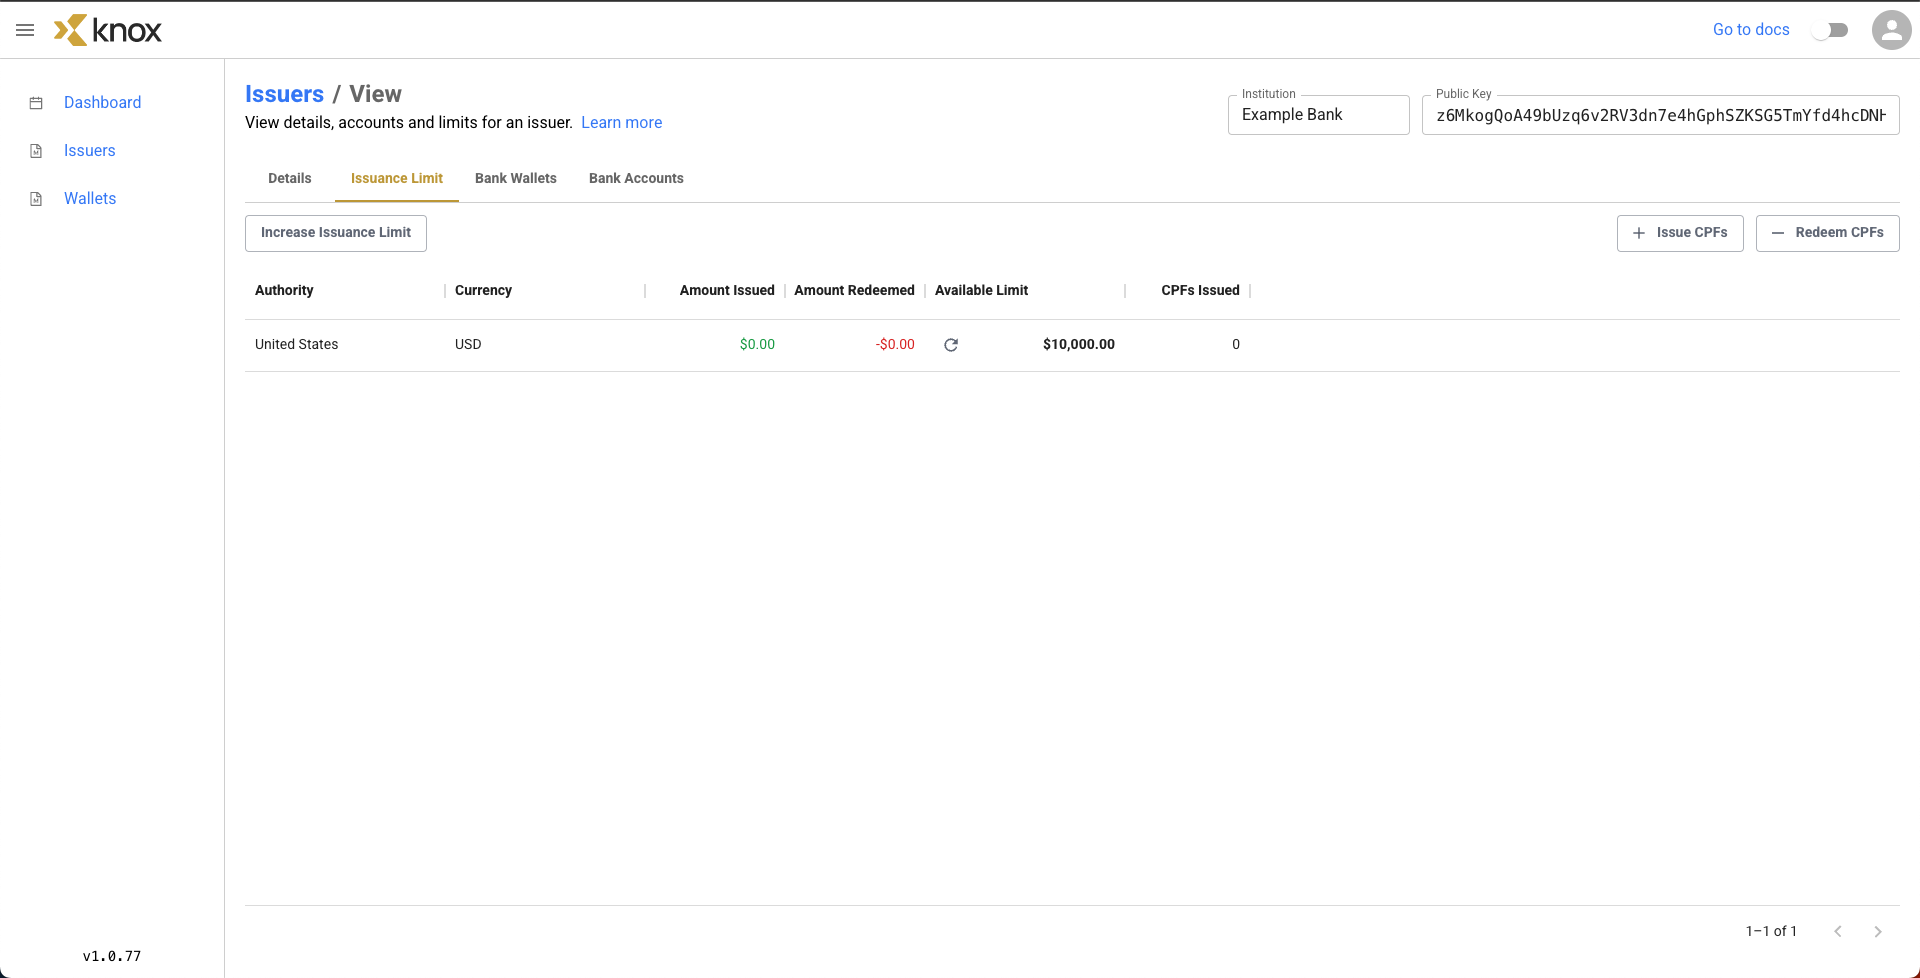
Currently, we have distributed and redeemed $0.00.

We can decide to distribute a CPF to our default Vault wallet using the Mint CPFs button in the top right corner. Let's mint $100.00. Before we click Distribute, we can see that our current available distribution limit is $10,000.00 above.

Now, $100.00 worth of CPFs have been minted, and our distribution limit has decreased to $9,900.00.
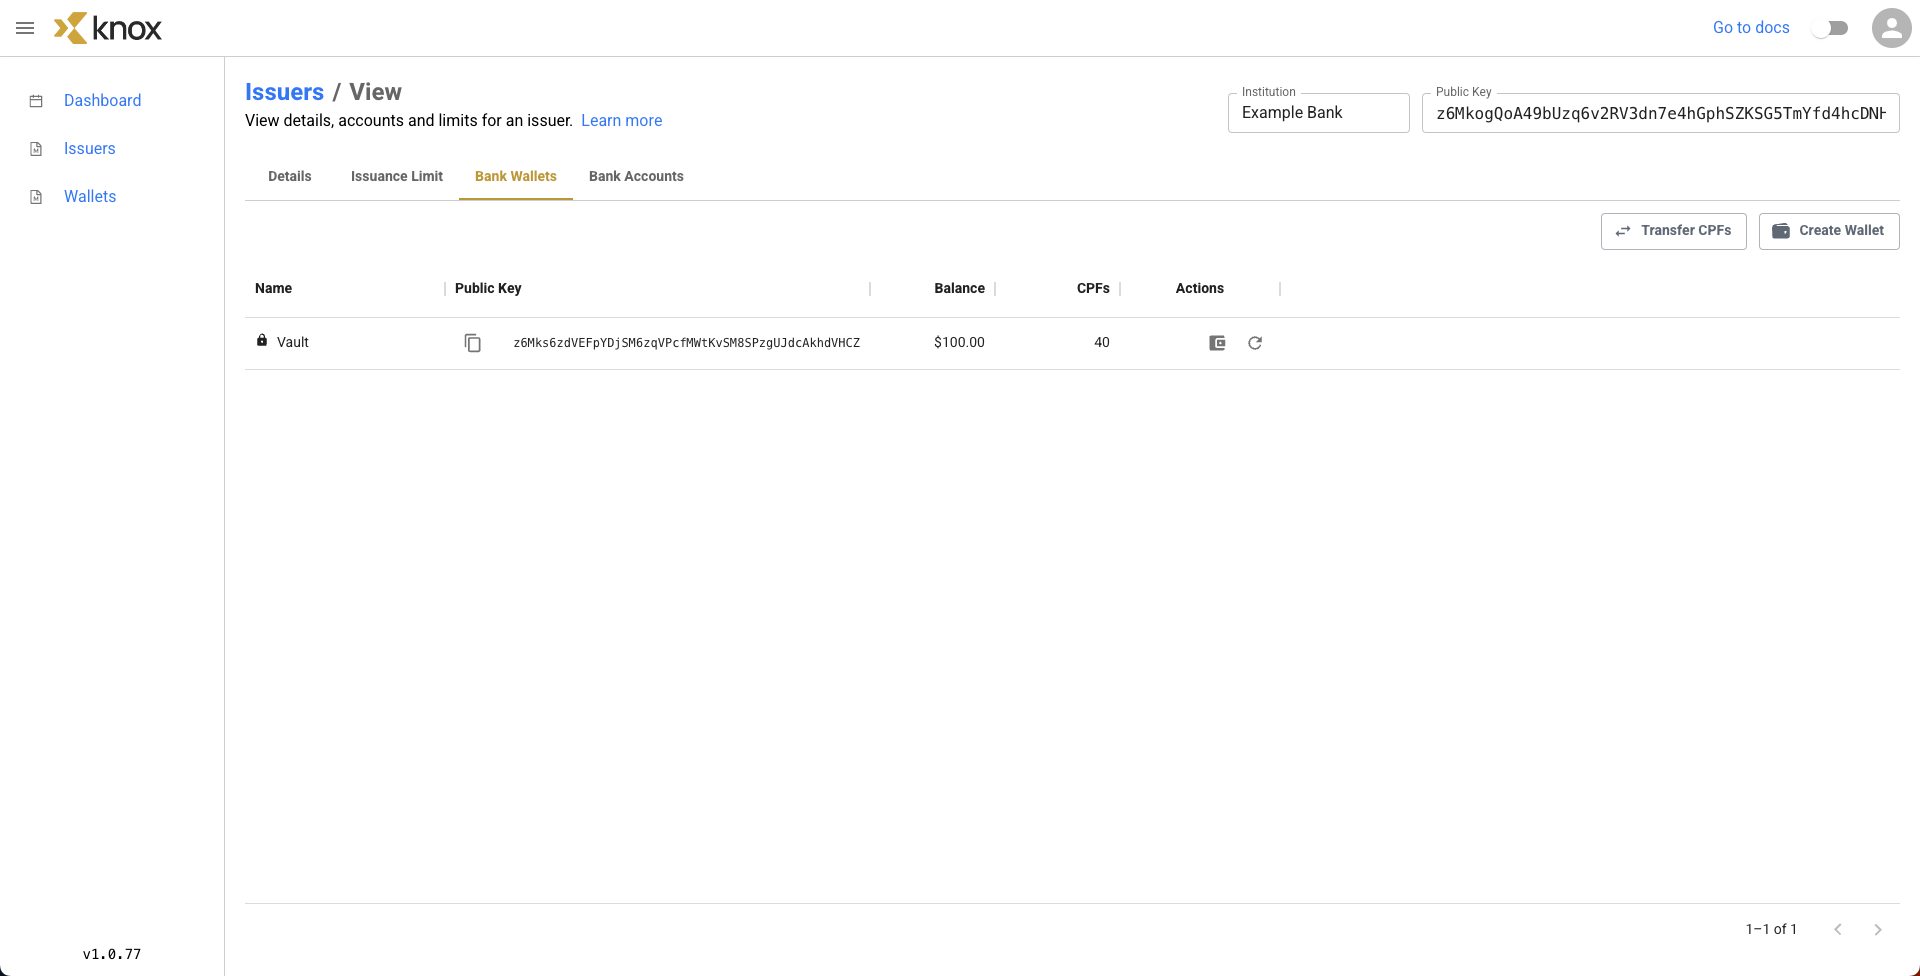
There were 40 separate CPF files minted (exact numbers might vary based on denomination of bills), which we can verify their value by clicking on the Bank Wallets tab. We still only have our default Vault wallet, so only one shows up. We can see the name, public key, CPF balance, and the number of CPFs distributed to the Vault wallet in the row above. Whereas before our Vault Balance was $0.00 before, it is now $100.00.
We can click on the Details button to get a better understanding of the Vault wallet's contents. The image below shows the contents of the Vault wallet, which is comprised of 13 different CPFs, ranging in value from $0.01 to $50.00, all of which add up to the $100.00 distributed.
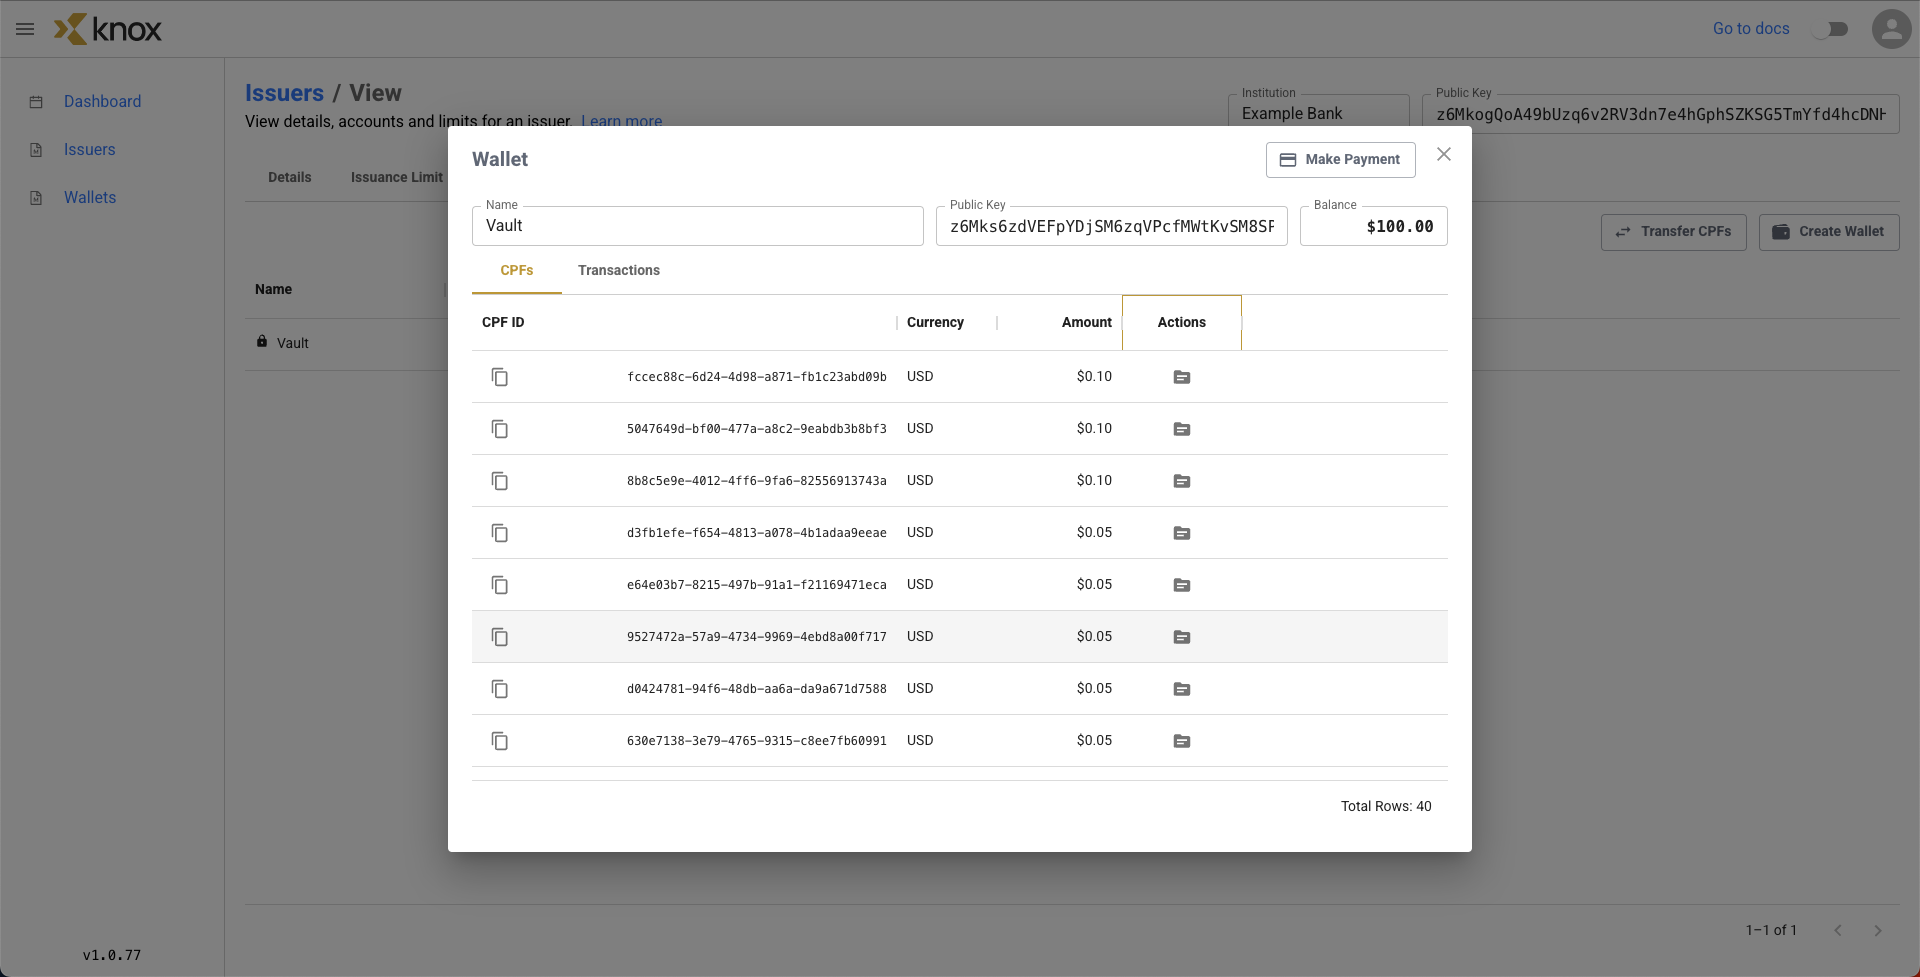
Currency denomination distributions are currently fixed within the Knox Networks Sandbox, but there are plans to add the feature to specify CPF denomination schemas.
Now that we've peaked inside the Vault wallet, we can even peak into the individual CPFs themselves. Let's click on the Folder icon for the CPF worth $50.00.
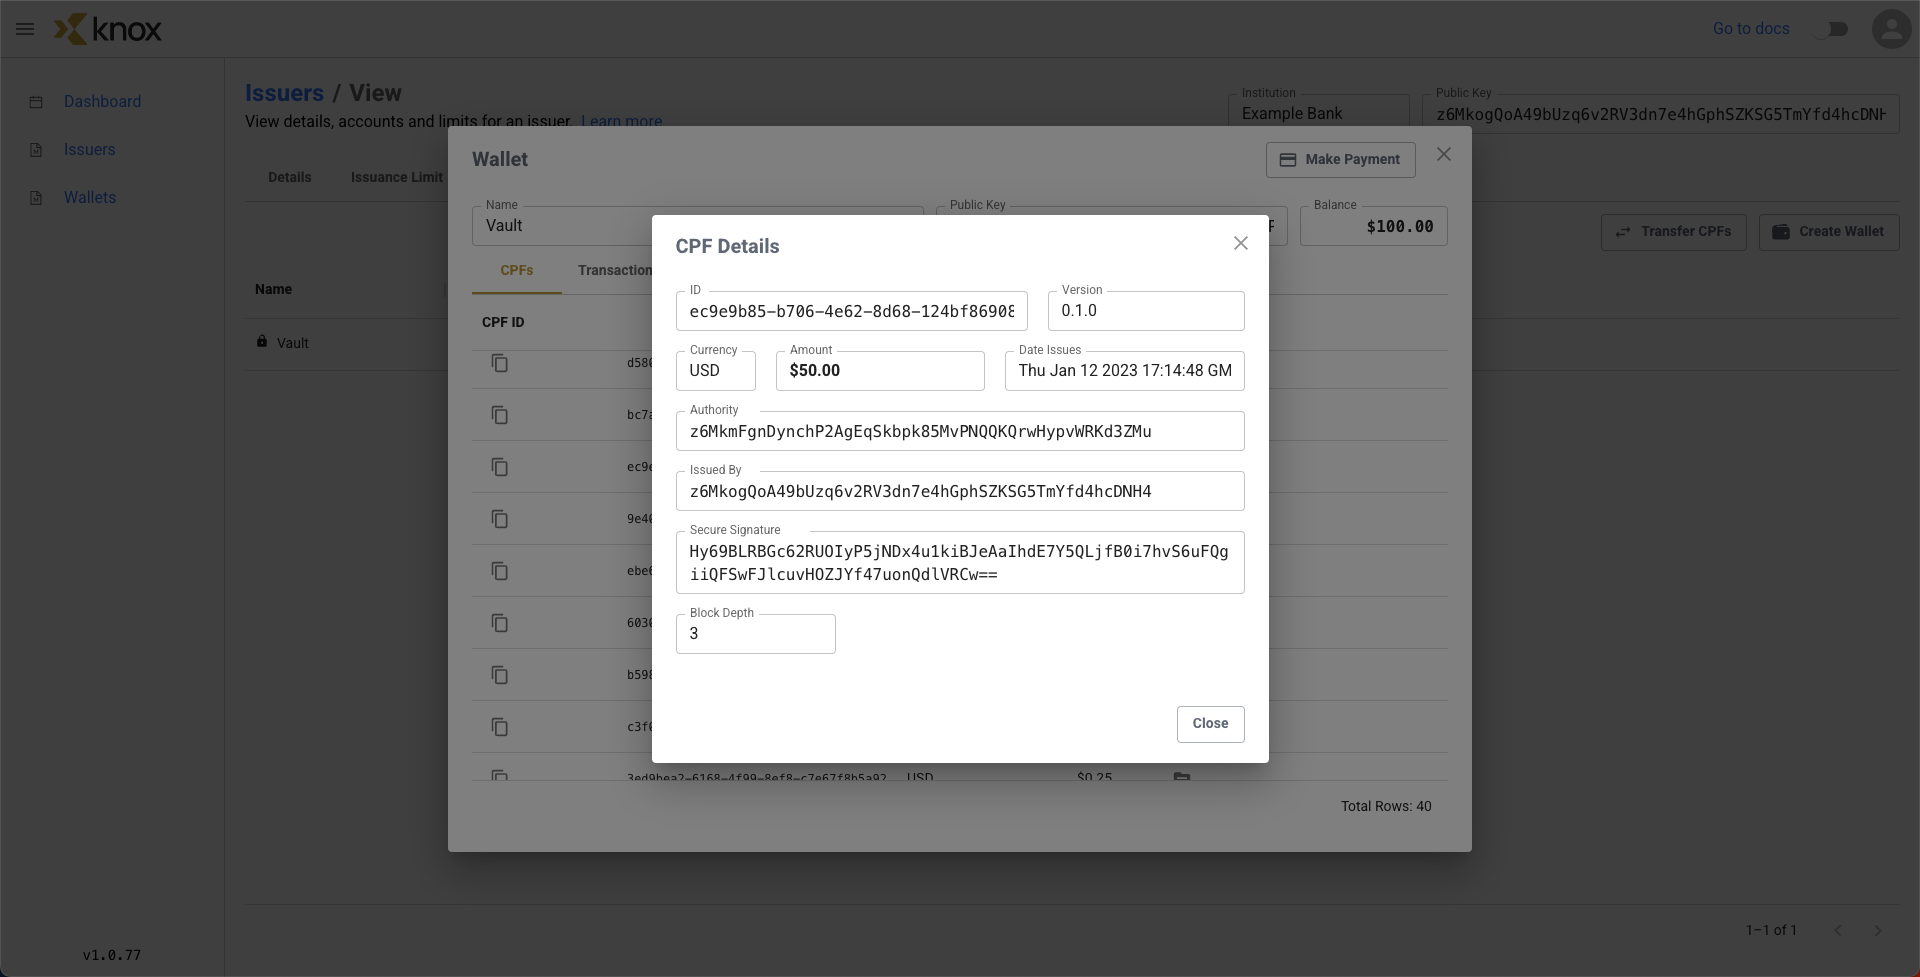
Here we can see all the relevant data for a CPF, including its currency, amount of value, its date of minting, and all of the relevant signatures by the Monetary Authority and the DFI (in our case, Example Bank).
We can also see the Secure Signature, which provides the cryptographic security for proving transfers of CPFs between parties. As each transaction occurs, the block chain length will grow within each CPF file to reflect this transfer. Currently, our CPF has a block depth of 3, which came from the creation and transfer of the CPF to our wallet.
Congrats on the distribution of some CPFs! Now let's transfer some money to Alice's Wallet in Sample Bank.
Step 3: Initiating a Payment
Since we are in a generous mood, we decide to pay $15.00 worth of CPFs to Alice's Wallet in Sample Bank. We can do this by clicking on the Make Payment button in the top right of the screen inside the wallet.
A menu will come up, asking us to fill out the following fields:
- The sending
Authorized Intermediaryand the sendingWalletbelonging to theAuthorized Intermediary(will already be filled out with our information) - The receiving
Authorized Intermediaryand the receivingWalletbelonging to theAuthorized Intermediarywe want to transfer to - The
Amountto be transferred
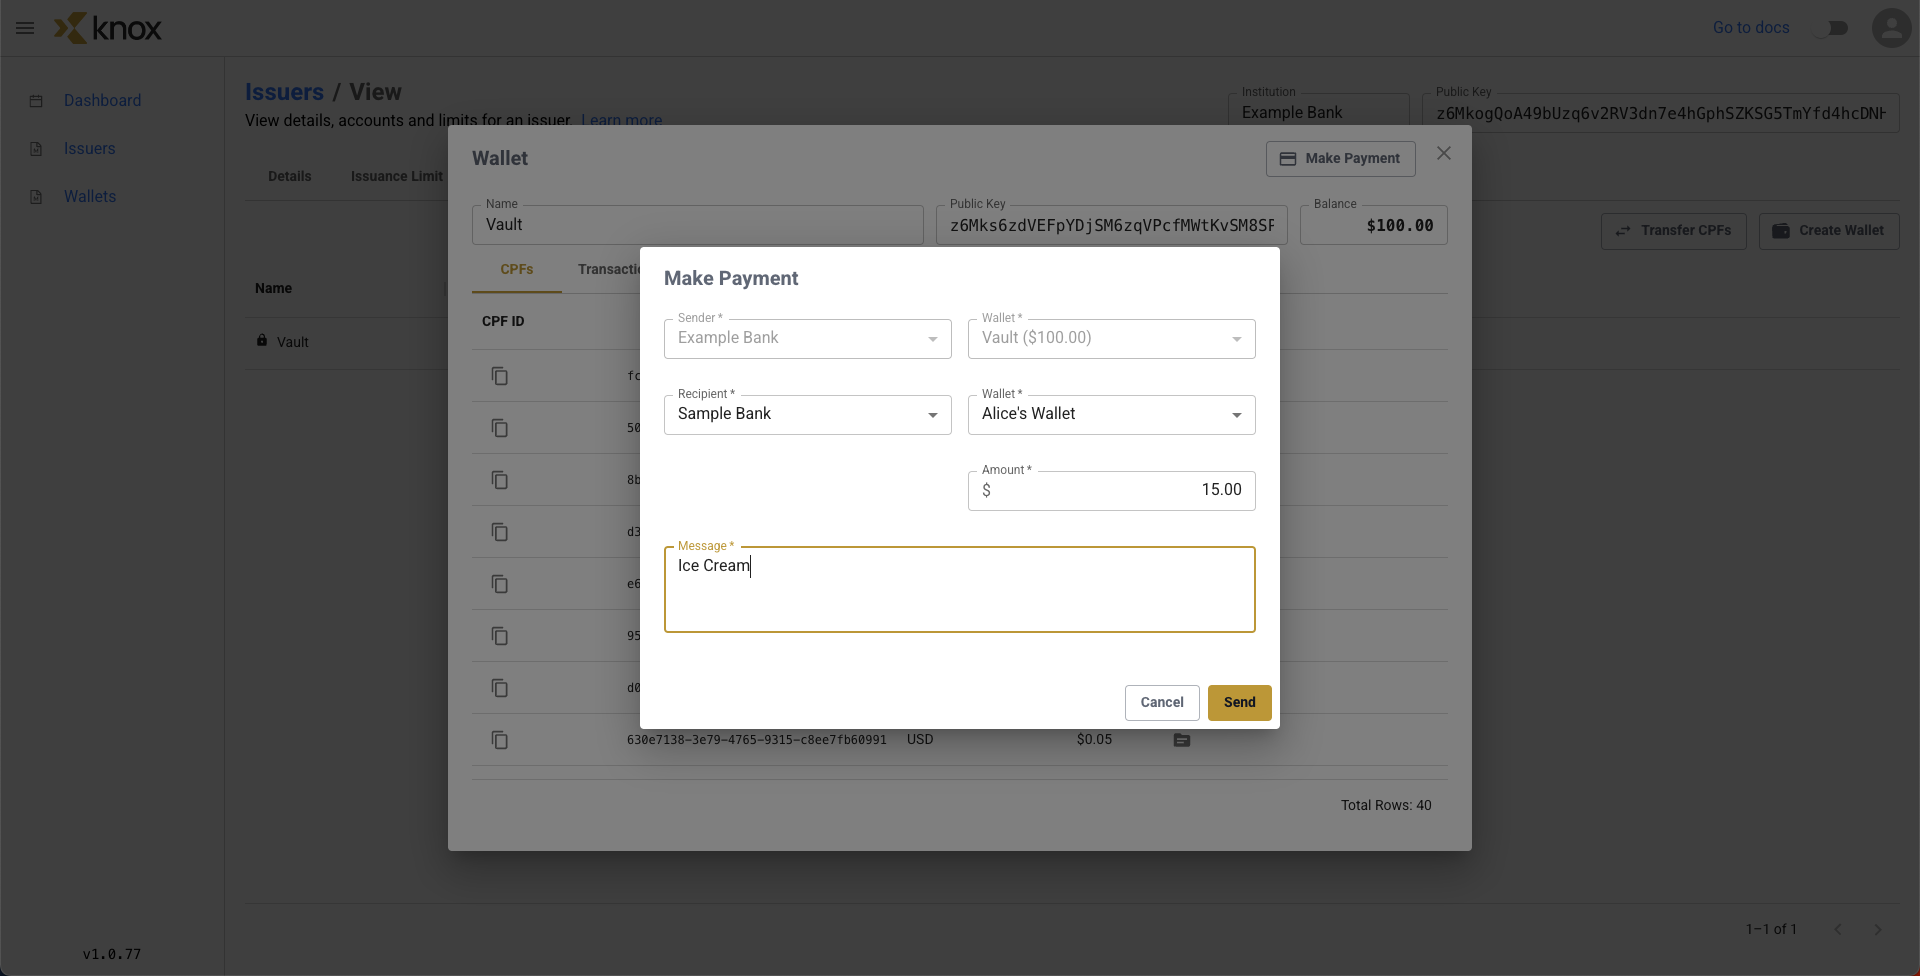
We saw the fields with a Sender of Example Bank and wallet of Vault, which has $100.00 were already filled out. We fill out the fields of Recipient of Sample Bank and wallet of Alice's Wallet. We decided the amount to transfer was $15.00 and with a message of Ice Cream, so we fill that in as well, looking like the figure above before we hit Send.
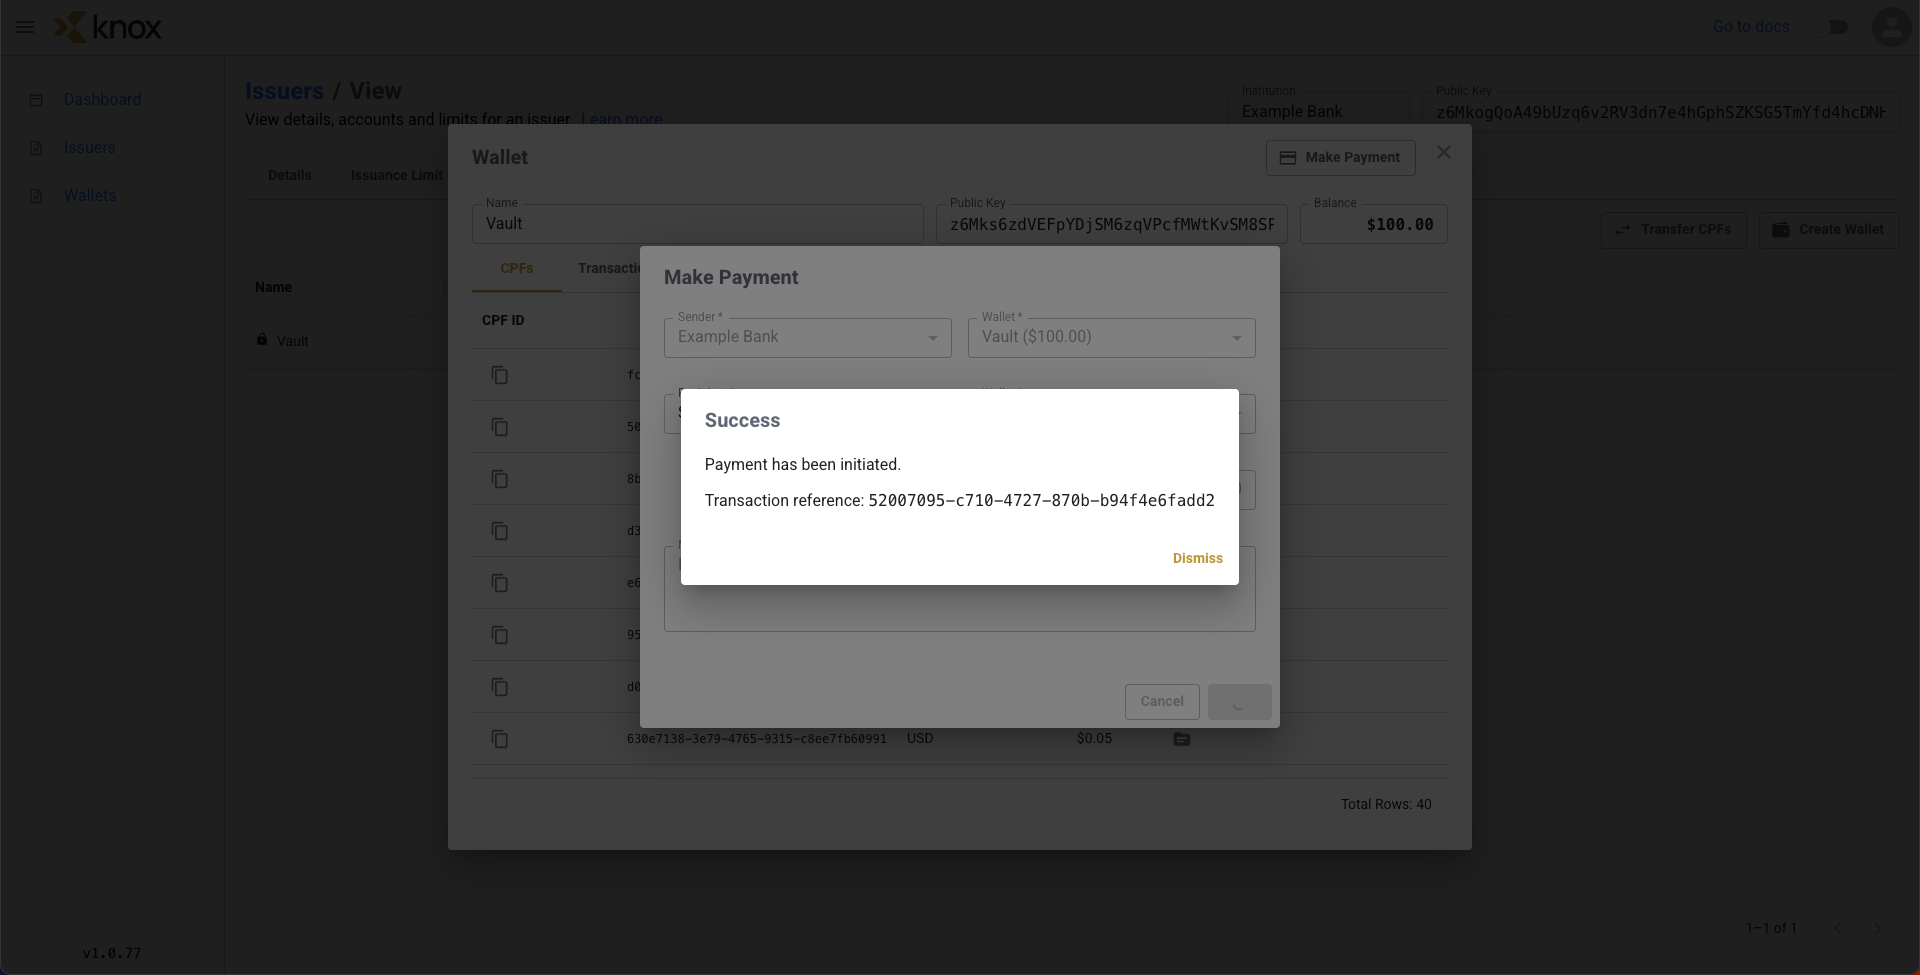
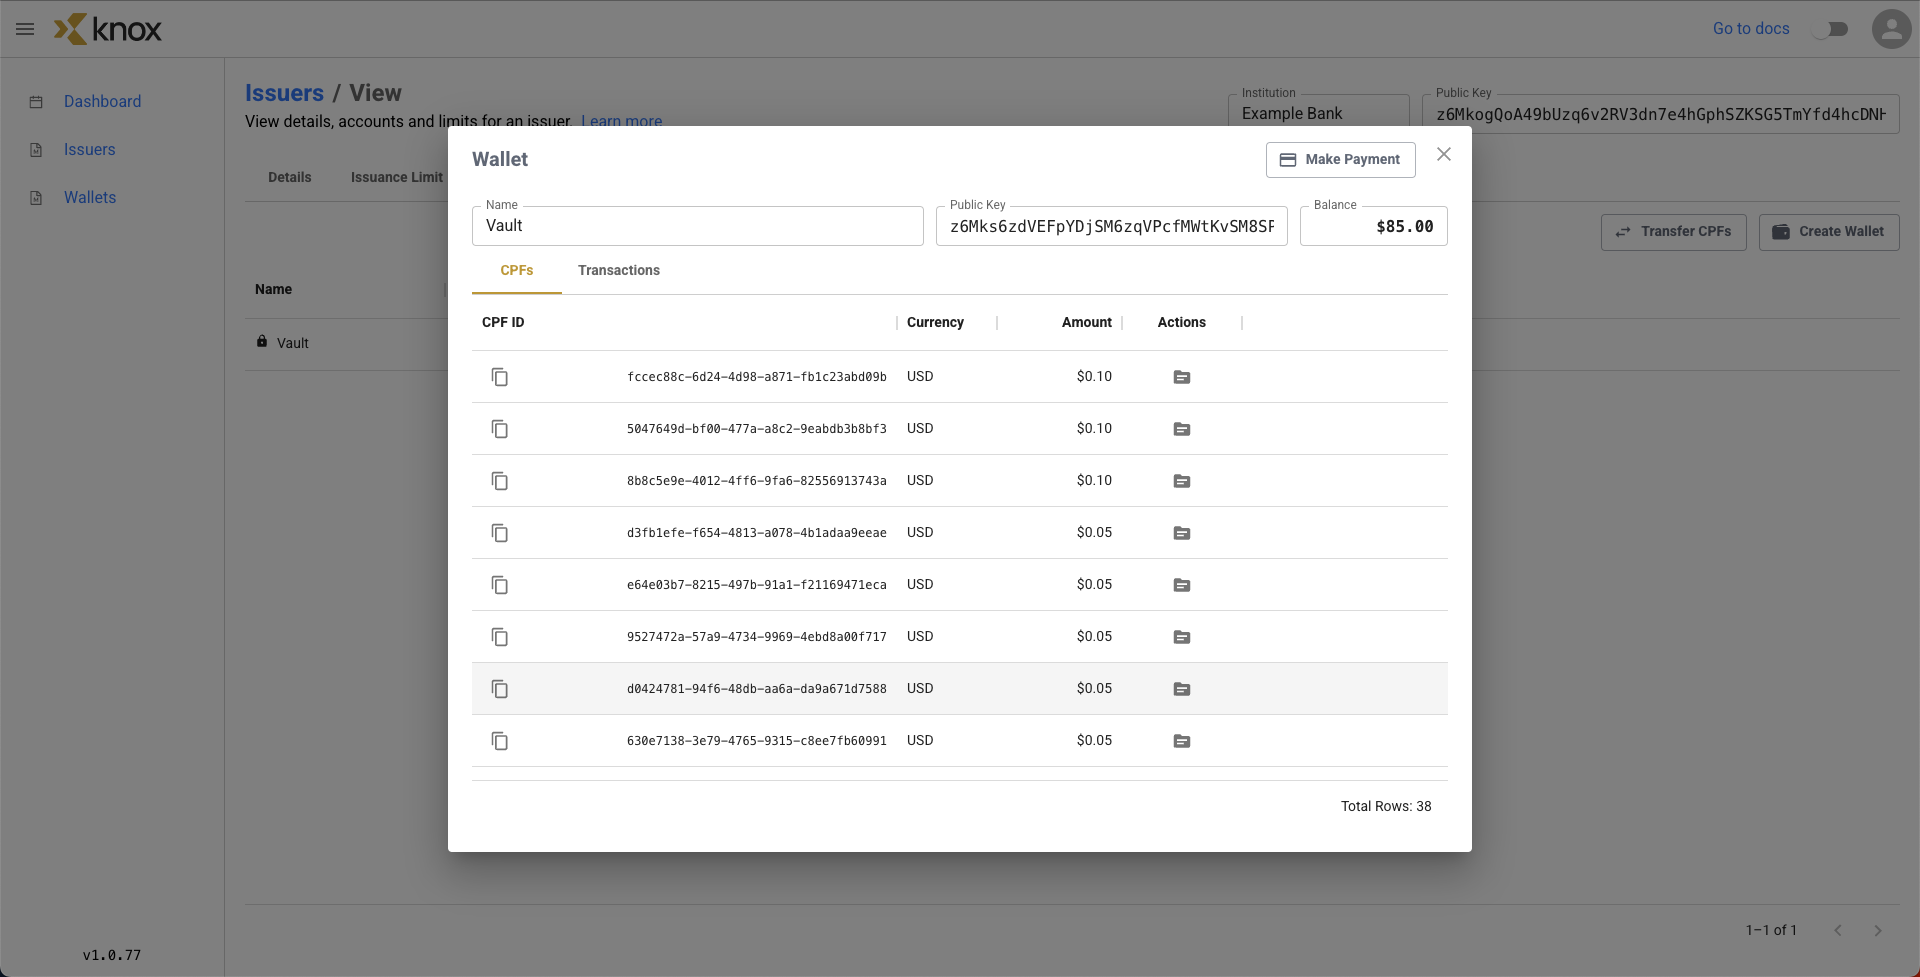
We can see the transaction reference number, and click Dismiss. Now after the Send, we can see that our Example Bank's Vault wallet has decreased by $15.00 in balance, and we have only have $85.00 worth of CPFs remaining. You may need to refresh the wallet to see the new balance.
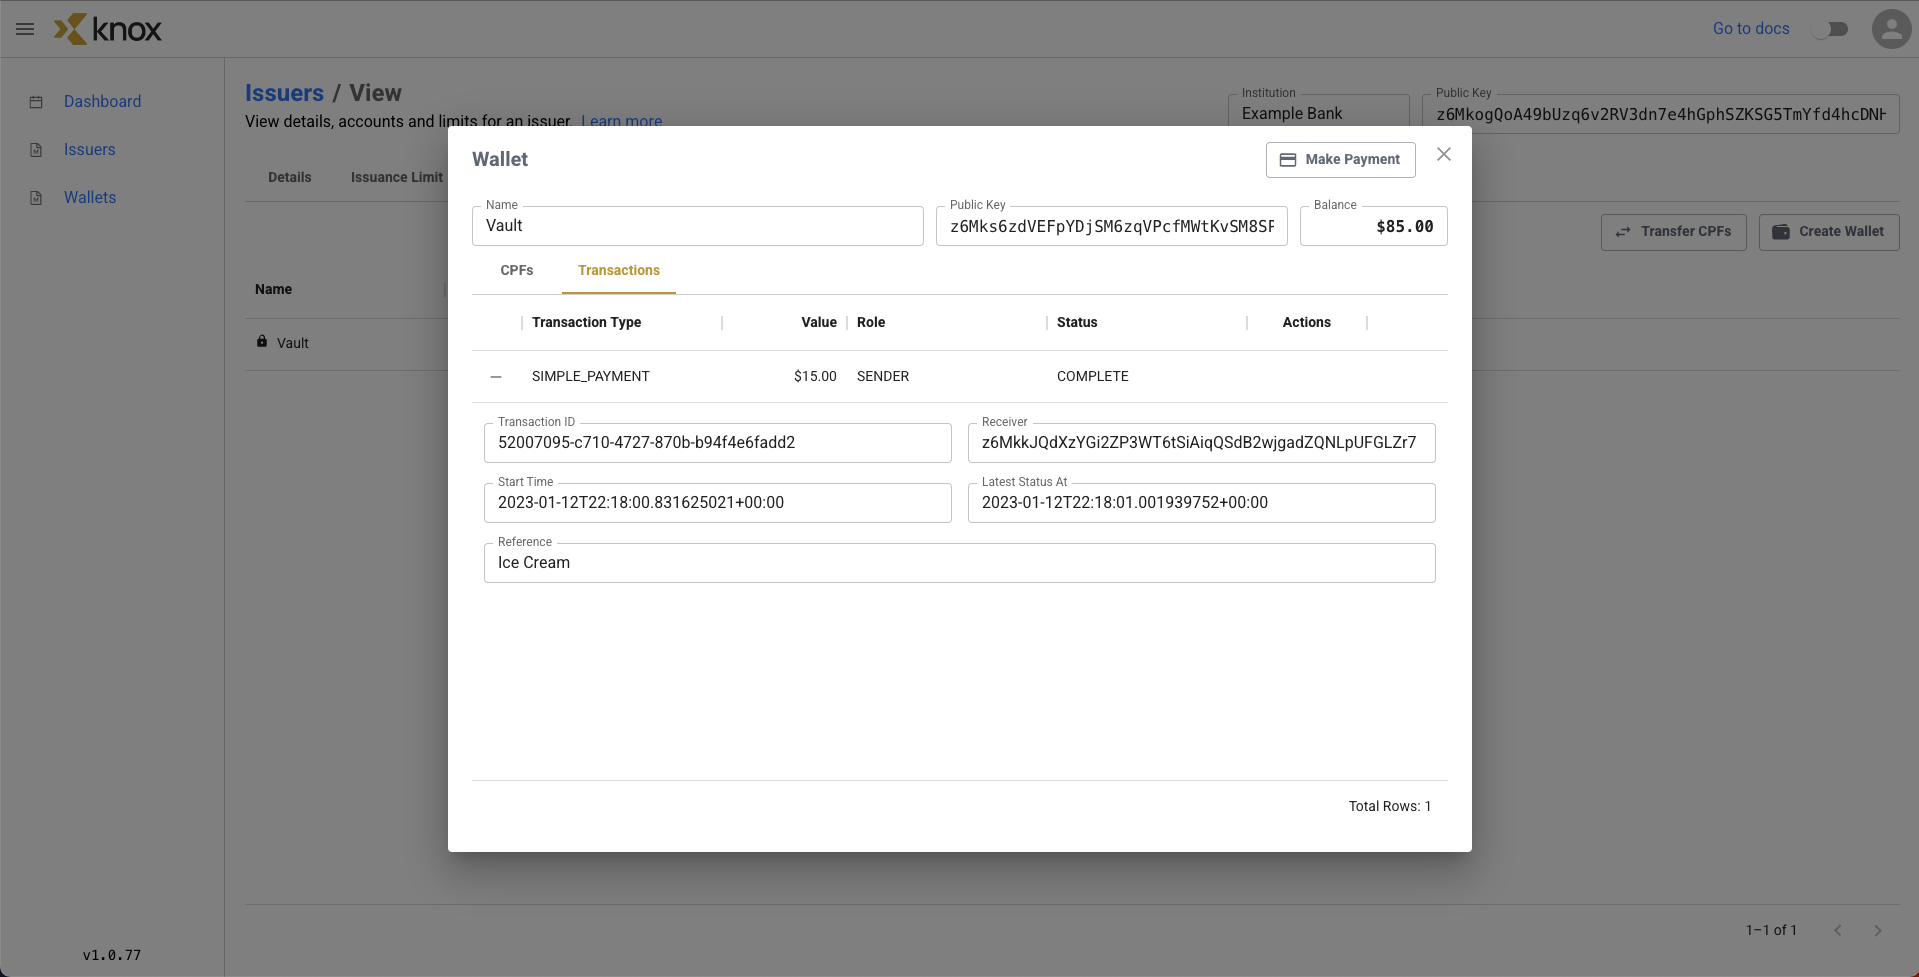
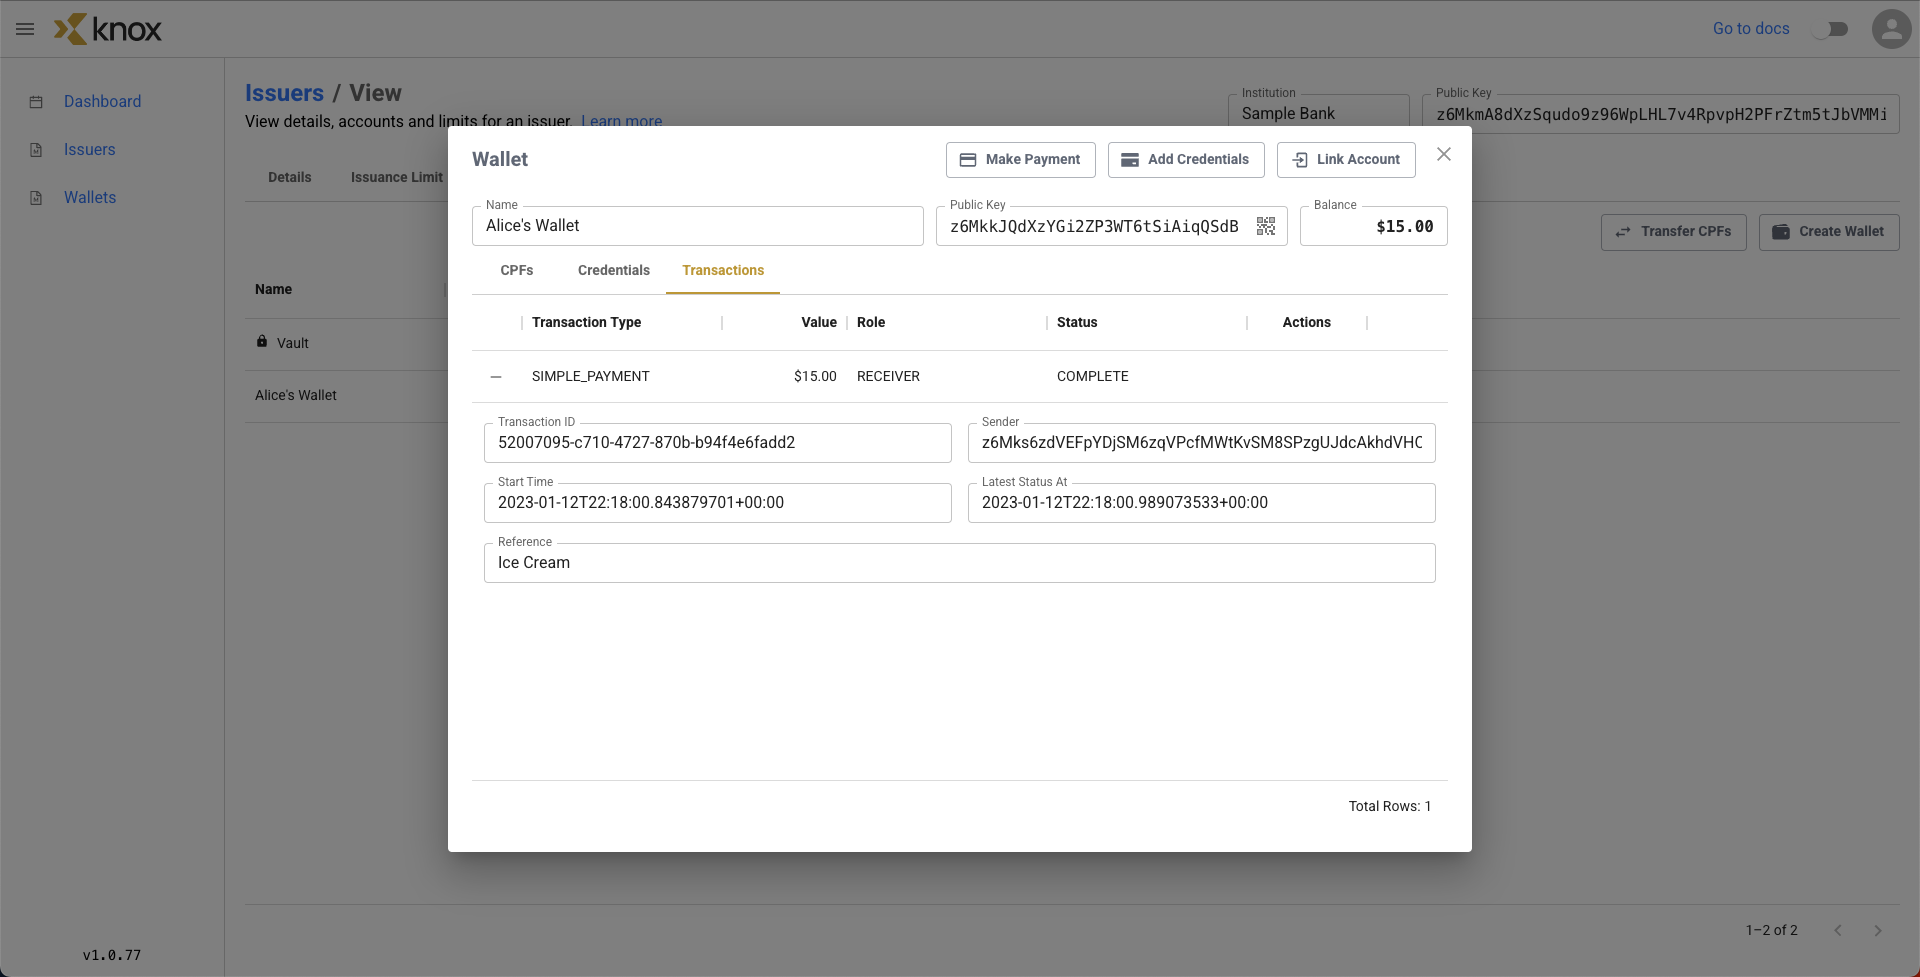
After clicking over to the Transactions tab for the wallet, we can see that a payment worth $15.00 took place, originating from this wallet. In this case, there were 2 files sent over, a $5.00 file and a $10.00 file
We can also check from Alice's Wallet in Sample Bank side as well, where it now shows an inbound transfer of CPFs occurred on the Transactions tab.
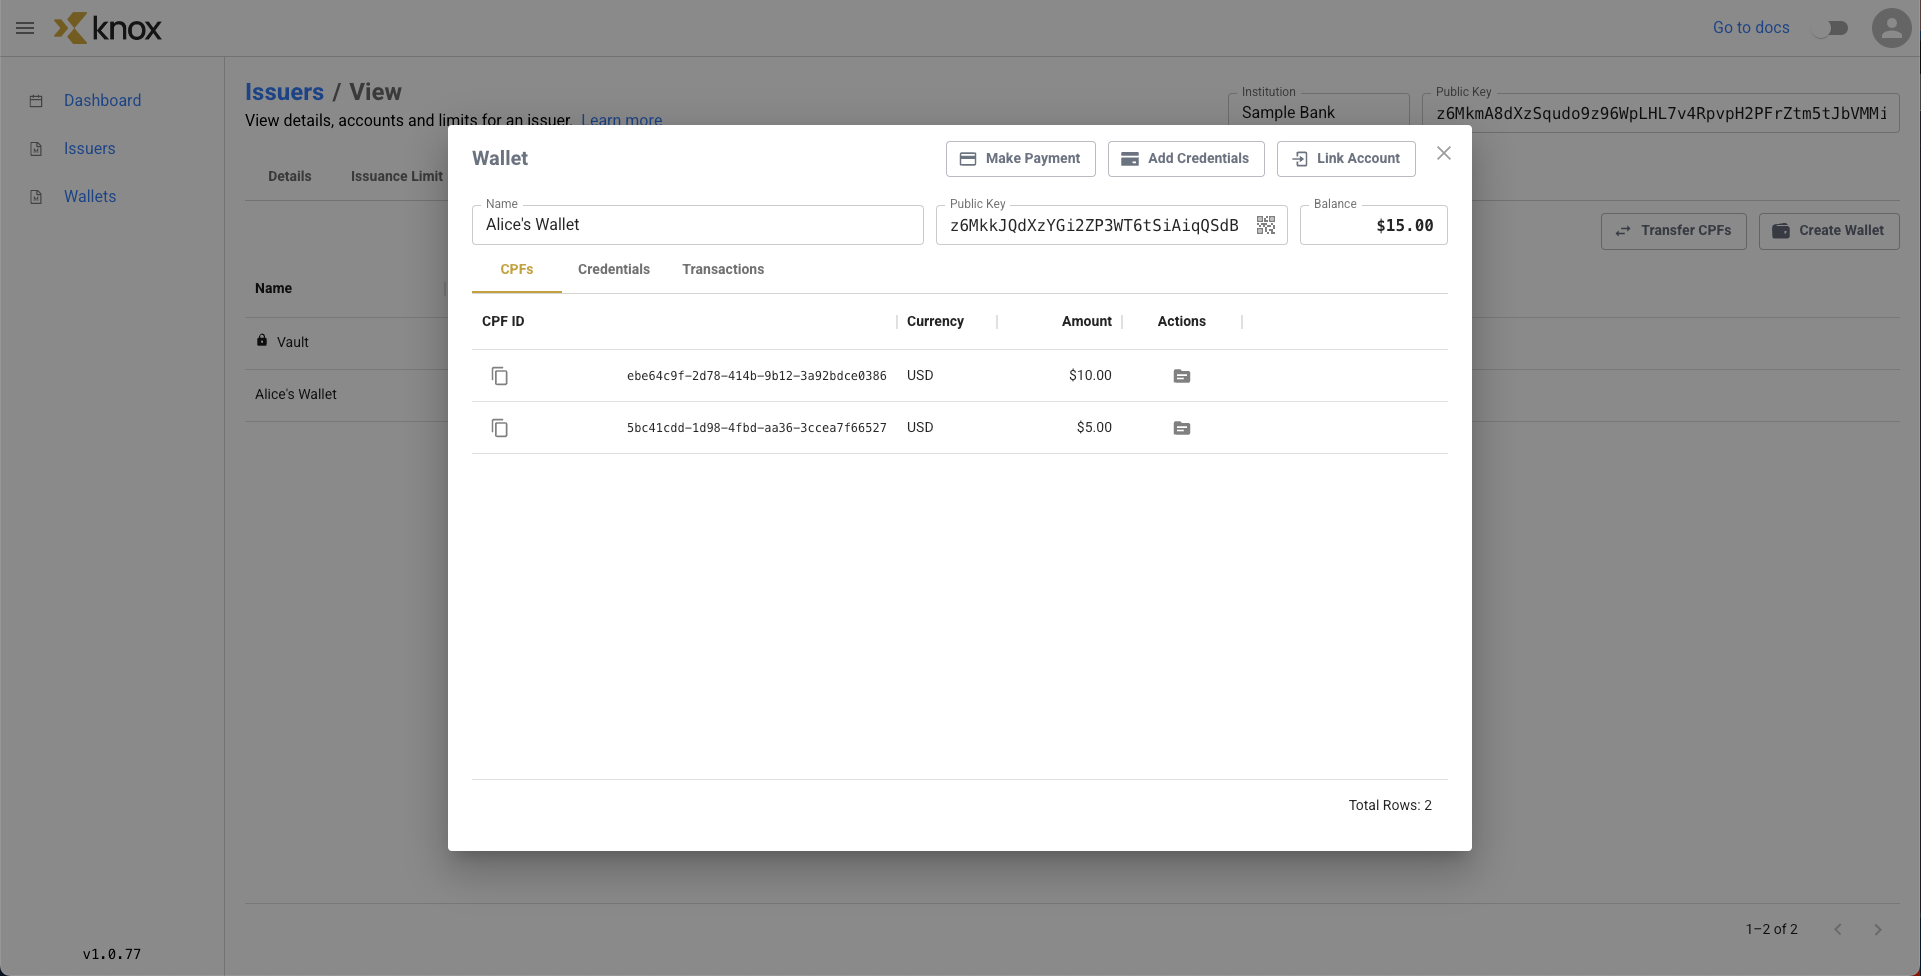
Clicking over to the CPFs tab, we see that the balance of our Receiving Wallet has increased by $15.00, and now has 2 CPFs in it, the $5.00 and $10.00 transferred.
In addition, we can verify the individual CPFs took note of this transfer by clicking on the details of a given CPF.
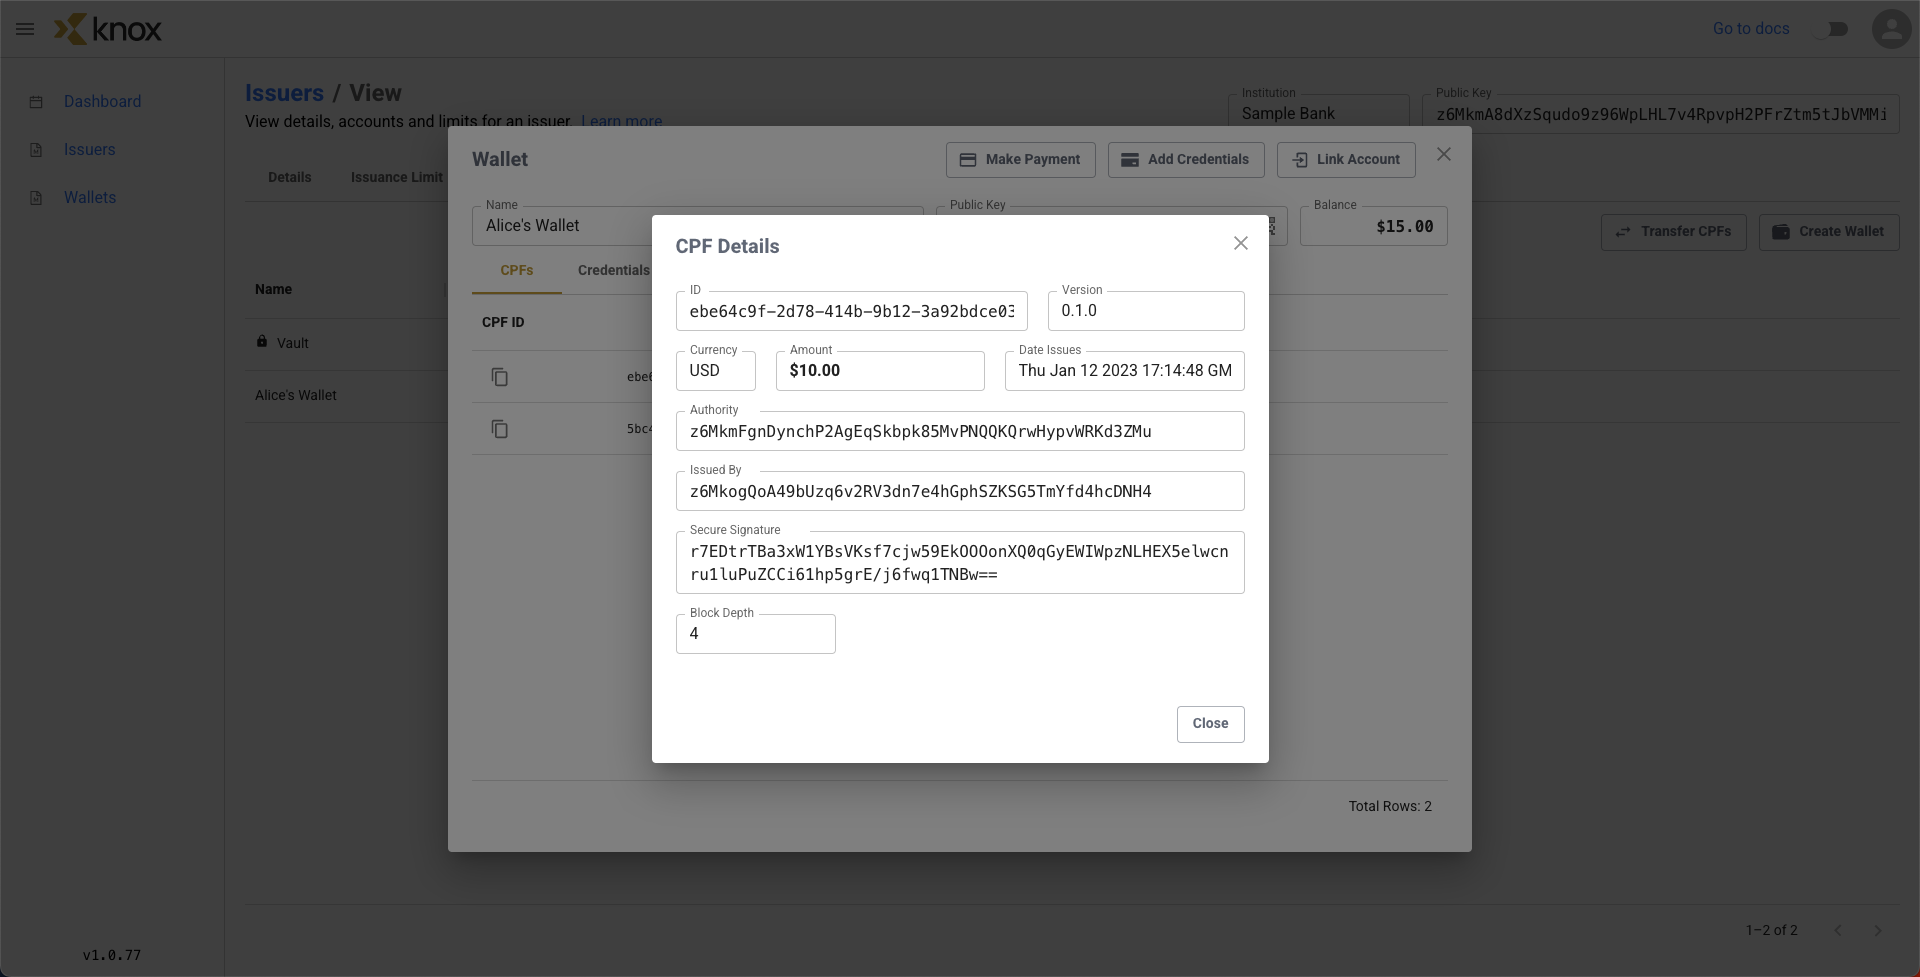
Previously, these CPFs all had a block depth of 3 (like the remaining $50.00 in the Example Bank's Vault), but the transferred ones now have a block depth of 4 (with the most recent transaction adding to this block depth).
Step 5: Redeeming a CPF
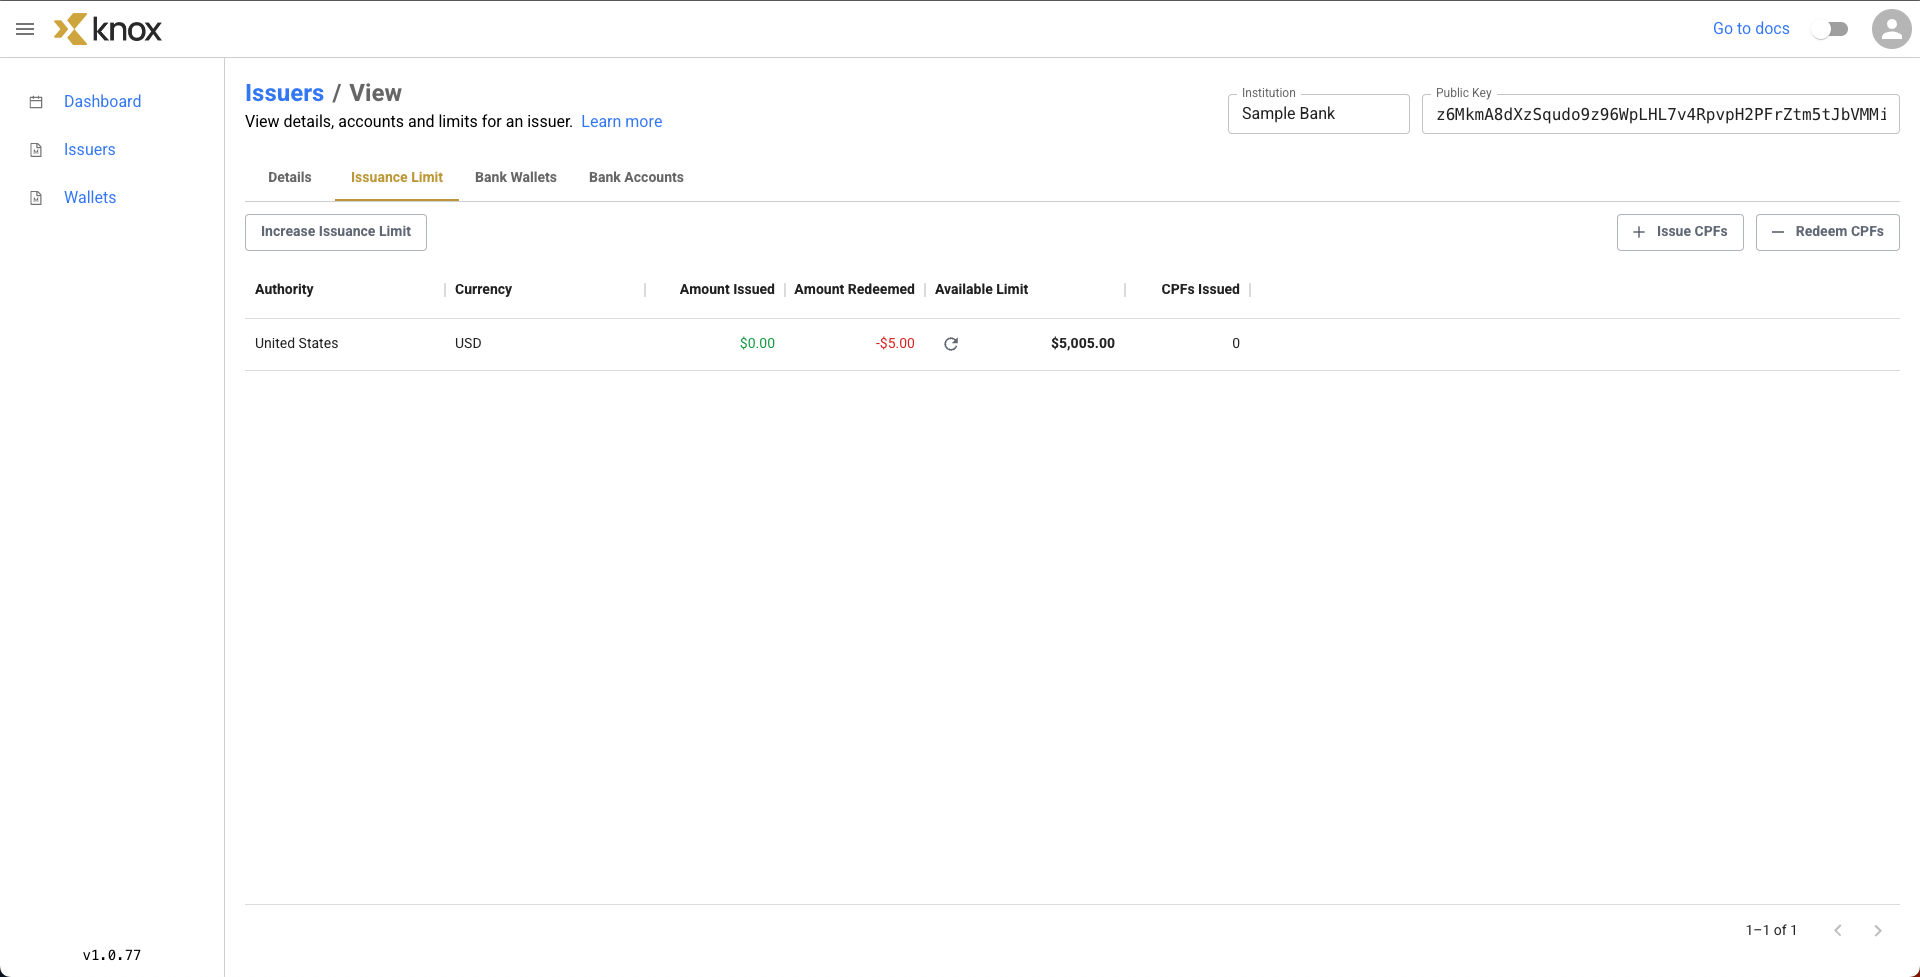
Now that Sample Bank has a CPF, it can redeem the CPF in the Distribution Limit tab. Click on the Redeem CPFs button in the top right.

Let's have Receiving Bank redeem $5.00 of the $15.00 sent by selecting Alice's Wallet and $5.00 for the fields.
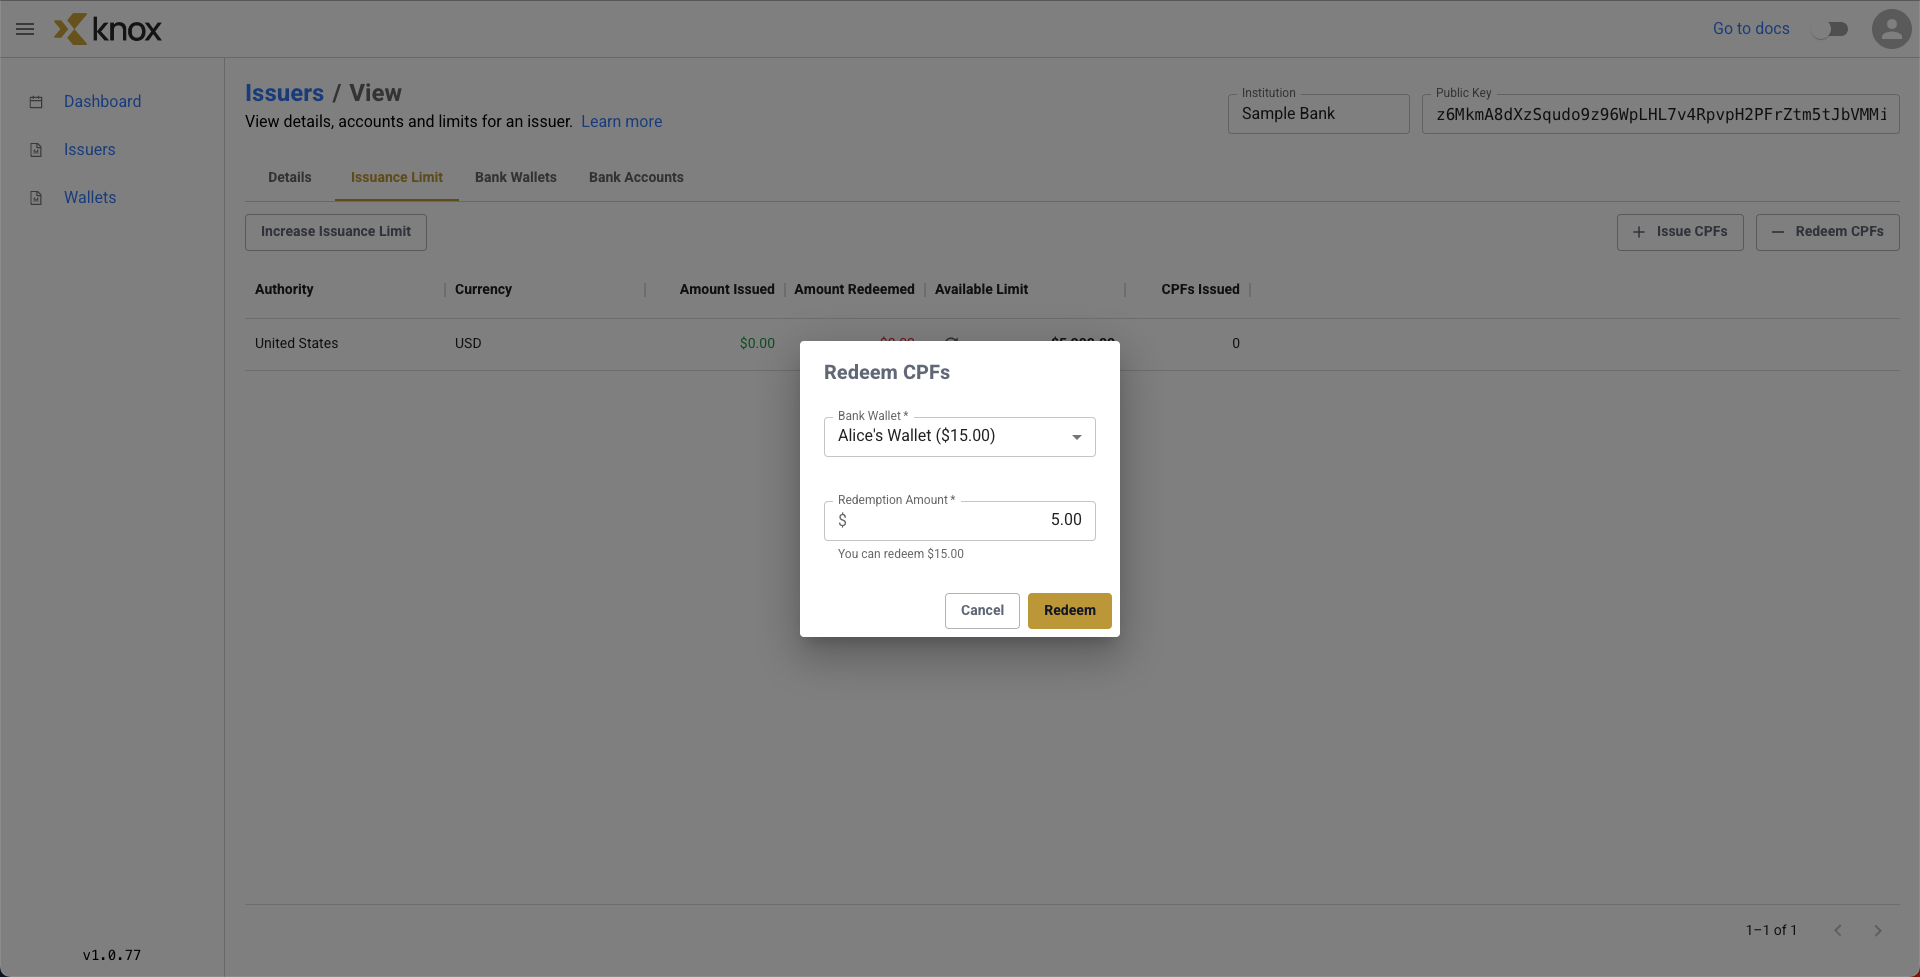
The CPF has now been redeemed! We can see that we now have $5.00 worth redeemed of CPFs, and our available limit has increased by $5.00 to $5,005.00.
Summary
We distributed $100.00 worth of Cryptographic Promissory Files (CPFs) to the Vault wallet of Example Bank. This decreased our Example Bank's available distribution limit by $100.00 down to $9,900.00. We explored the Vault wallet's CPFs.
We then initiated a payment of $15.00 worth of CPFs from the Vault to the Sample Bank's Alice's Wallet. This decreased the balance on the Example Bank's wallet and increased the balance on the Sample Bank's wallet. We then verified that this transfer had taken place at the CPF level.
Finally, we decided to redeem $5.00 worth of CPFs for the Sample Bank, which increased our available limit by $5,000.00 to $5,005.00
Updated 4 months ago